Showing posts with label Eyes. Show all posts

Monday, July 22, 2013

OCC Creme Colour Concentrate Review and Swatches

Obsessive Compulsive Cosmetics is a brand I've grown very fond of lately.  Their most well known product is, of course, their lip tars, which are mixable, opaque liquid lip colors that come in unique colors.  Now, OCC has an intense cream product that's suitable for use on eyes, lips, and cheeks.  I bought two of them, Cthulu, a pea green, and Terra Firma, an orangy brown, and fell so desperately in love, I purchased three more, Miriam, John Doe, and Grandma.
The texture of these products is similar to a dense, matte lipstick, and bear resemblance to the Illamasqua cream pigments.  One of the benefits of these is that they are safe for eyes and lips, and they don't crease as badly as the Illamasqua product when used on the eyes (and please note, I am very prone to creasing), though, being cream products, they are prone to creasing.  Topping with a powder shadow or a loose powder will ameliorate that problem.  On cheeks, they're slightly dry, but blendable.  They'd do best either blended onto an emollient base or tapped lightly.  On lips, they are a satin-matte finish, and are quite comfortable to wear. 
What I love most about these are the nuanced and unusual colors, something anyone who's used a Lip Tar has come to expect from OCC.
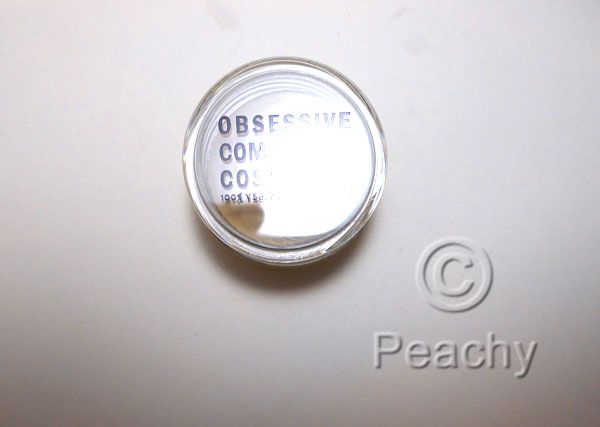
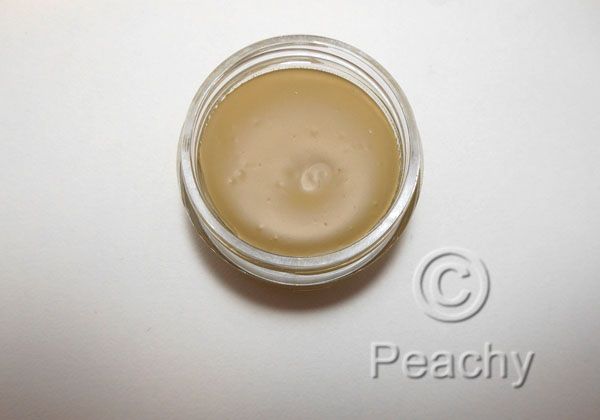
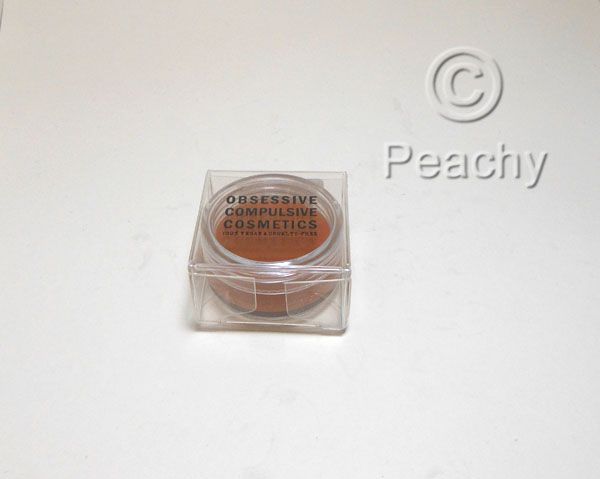
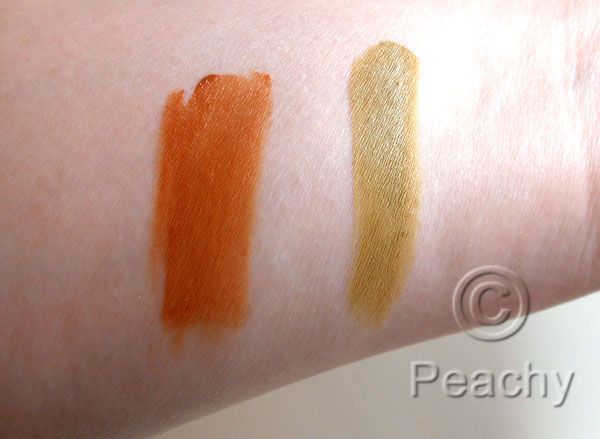
Cthulu is described as a dirty, pale olive.  It is a light pea green shade, with subtle gray and brown undertones.  It's reminiscent of a 70's avocado colored refrigerator, only lighter.
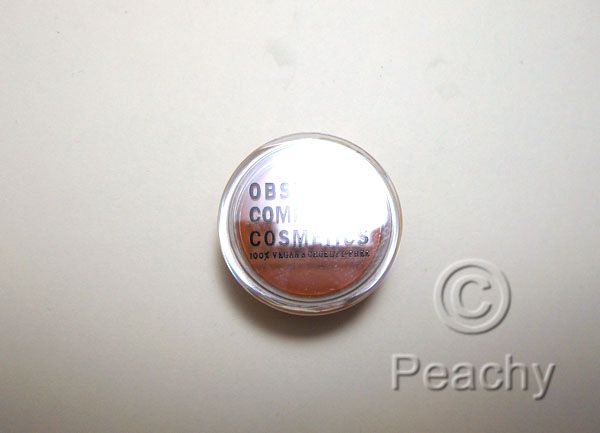
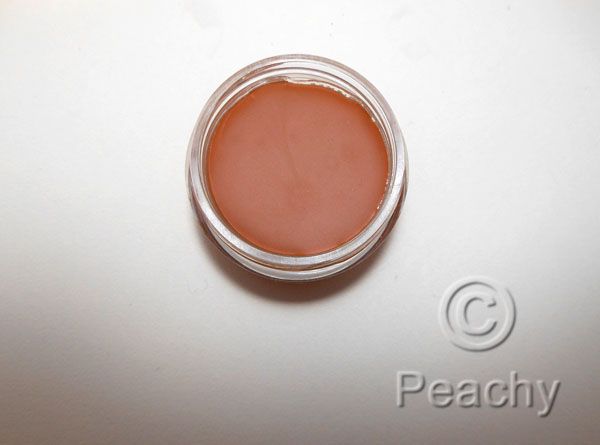
Terra Firma is described as burnt sienna brown.  It's a russet orange-brown shade that would work well on eyes, lips, cheeks, and, while an unusual color, I still think a lot of people would be comfortable wearing it.
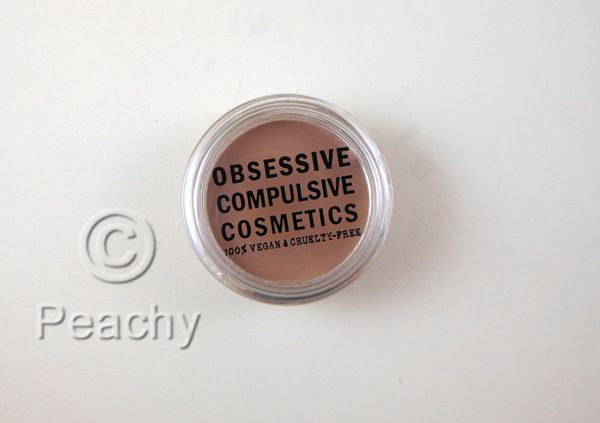
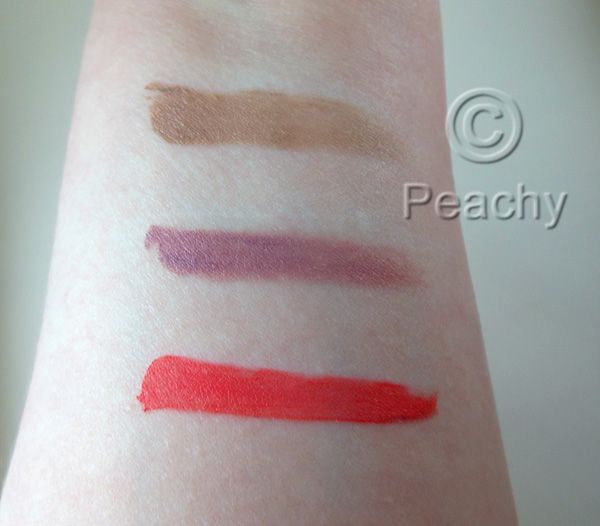
John Doe is described as pale, ash-toned taupe.  It's a very light beige-taupe with strong gray undertones and a hint of yellow.  It's very cool and light, and makes for an excellent cream contour problem on fair skins.  Compared to Illamasqua Hollow, it is cooler and very slightly lighter.
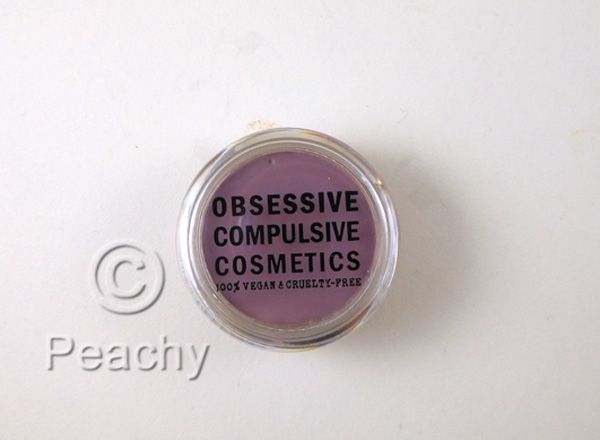
Miriam is described as a subdued, whitened plum.  It is a grayed light purple, leaning mauve, with a bit of pinky warmth.  It's an unusual, but not necessarily unflattering, lip and cheek color.
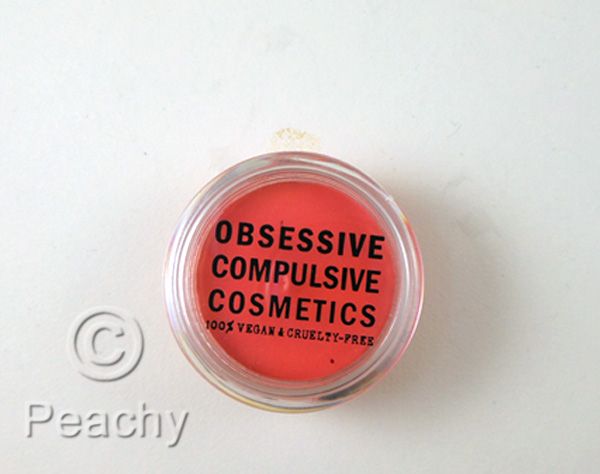
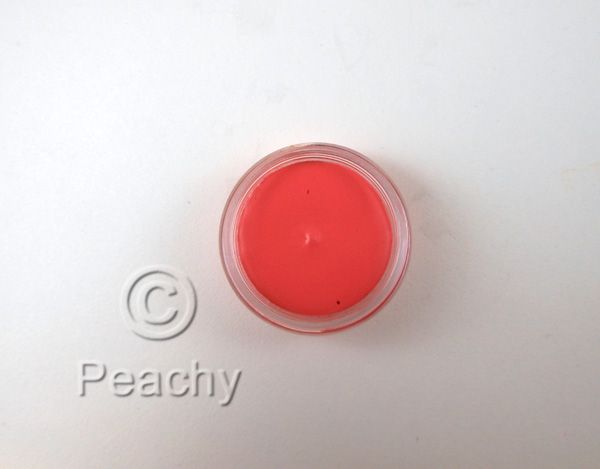
Grandma is described as a clean, classic coral.  It's very similar to the lip tar of the same name, and is a very bright coral with a good balance of bright pink and orange undertones.  To my eye, it leans slightly toward orange, though that would change depending on skin tone and natural lip color.
 
Cthulu
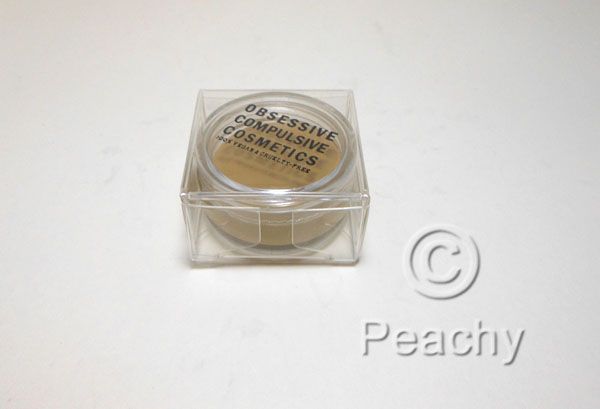
Terra Firma
Swatches of Terra Firma (l) and Cthulu (r)
John Doe
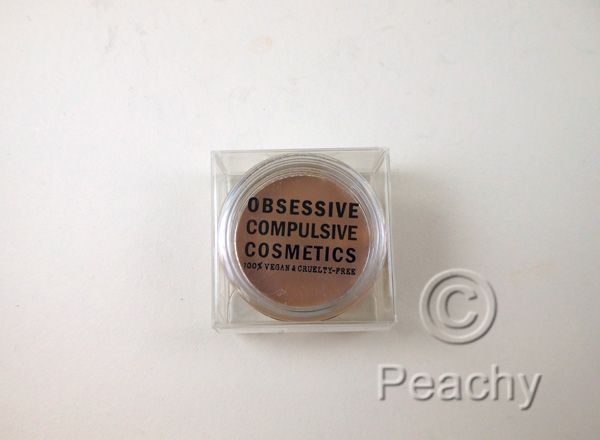
Miriam
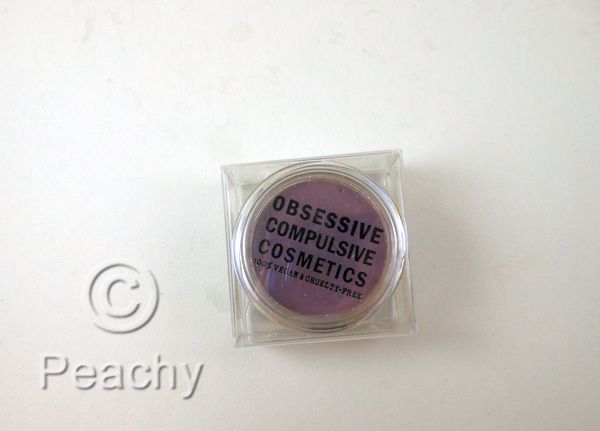
Grandma
Swatches of (from top to bottom) John Doe, Miriam, and Grandma.  Grandma appears slightly redder than in real life.
Comparison of Illamasqua Hollow Cream Pigment and John Doe
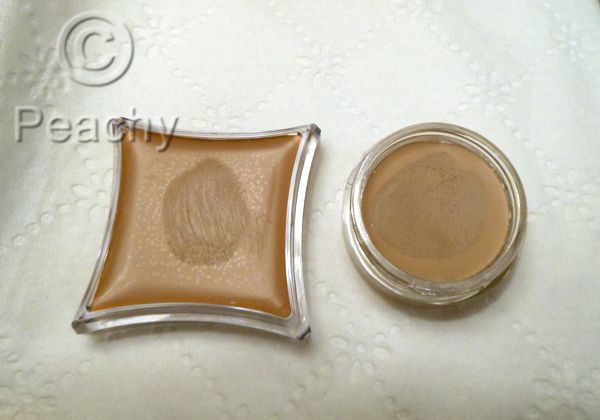
Swatches of John Doe (left) and Illamasqua Hollow (right).  Sorry I switched them.
As you can see, Hollow is warmer than the ashier John Doe.
 
OCC Creme Colour Concentrates can be purchased form Sephora online or from Obsessive Compulsive Cosmetics.  They retail for $20, which is what I paid for all these suckers.

Thursday, August 30, 2012

A Guide to Brushes: Eye Brushes, Part 6: Detail Brushes

This post features a variety of eyeshadow brushes for use on small areas of the eye.  It includes pencil brushes and various smudge brushes.

Pencil Brushes
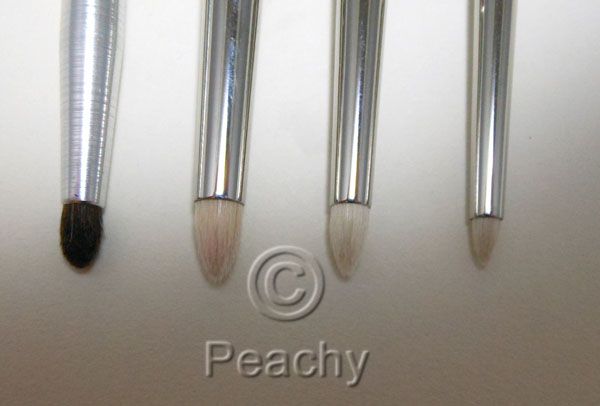
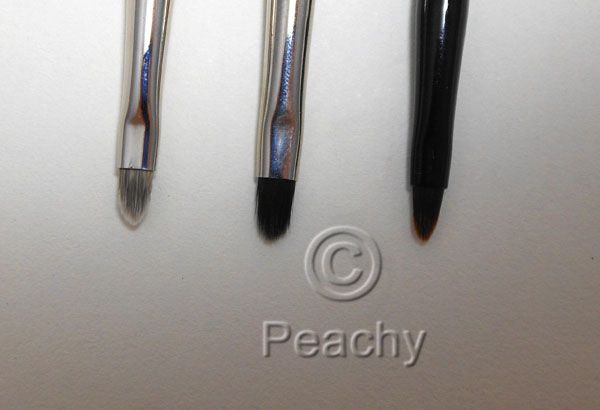
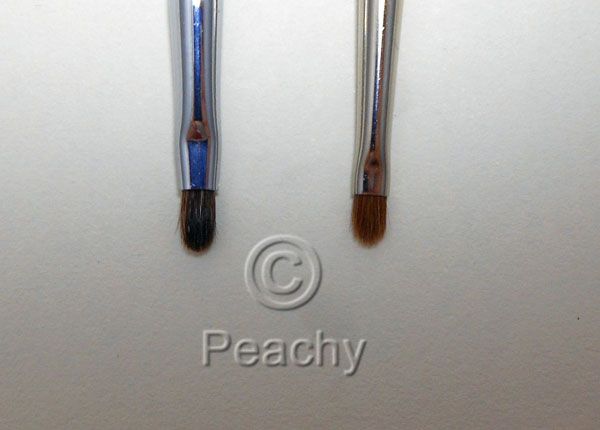
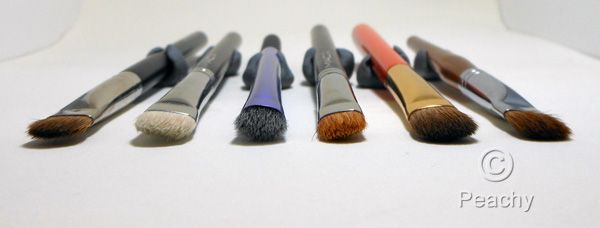
The most common and used of detail brushes, I believe.  The first on the left, which is an Essence of Beauty Fine Crease Brush, notwithstanding, a lot of pencil brushes are goat, like the MAC 219, Hakuhodo G5514BkSl, and Hakuhodo G5515BkSl here.  This picture makes them all look so big, but the Hakuhodo G5515 is about an eighth of an inch long.  These brushes are great for blending out eyeliner, applying shadow to the upper or lower lash lines, precise crease shadow placement, detail in the outer corner (like the dreaded "outer v") and highlighting the inner corner or the brow bone--basically anywhere you want focused or intense placement of eyeshadow.  Goat is a good fibre for this sort of brush, because it provides a good amount of stiffness and softness and holds up to cream eyeliners, but the white hairs get stained so badly (as evidenced by the faint pinkness of my 219.  The Hakuhodos are so pristine because they came straight out of the package before this picture.  The smaller one is now a lovely shade of blue.  The stains do respond usually to oil cleansing, but since oil cleans best when used dry, if you're halfway through cleaning when you realize that pigment is not coming out with cleanser, then you have to wait for it to dry.  At that point, the "Eh, it's clean, and I gotta do ma face" instinct kicks in and next thing you know, you're justifying a pink brush on the internet.  Uh, yeah.  These brushes do their job well, and as detail brushes go they're the most common and most used. 
 
Pointed Smudge Brushes
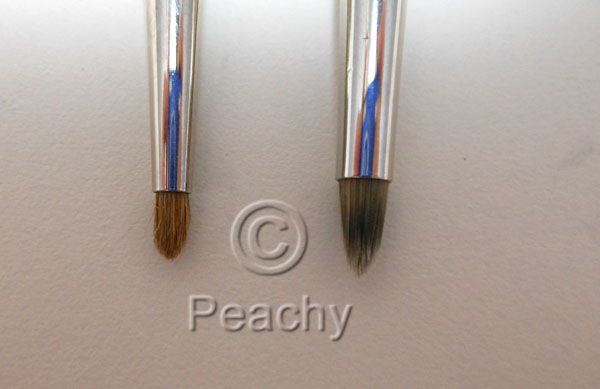
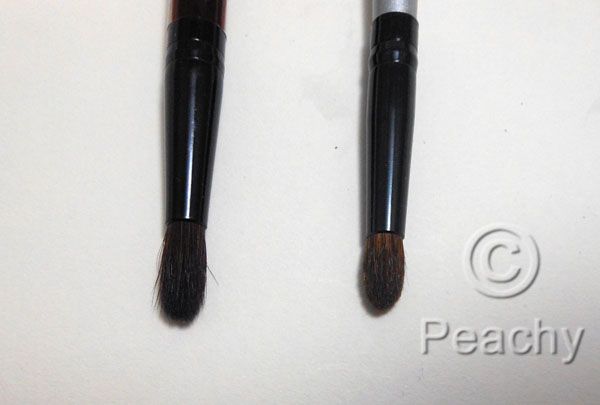
A variation on the pencil brush, pointed smudge brushes are most commonly found as "Smoky Eyeliner Brushes", like the one on the right from Sephora, which is synthetic.  The one on the left, also by Sephora is a discontinued point smudge brush.  Both these brushes, though they have different shapes, serve the same purpose, which is to apply or smudge eyeliner and apply eyeshadow to a small area.  I think they're more precise than pencil brushes, especially the point smudge, though it's scratchy.  The smoky version of the brush is great if you're looking for a synthetic detail brush, and it is quite good for smoking out liner.  It's less useful for applying powder, unless you want a subtle effect. 
 
Mini Smudge Brushes
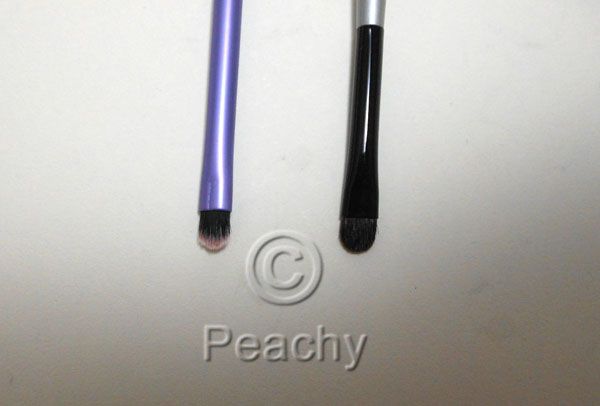
These brushes are like tiny flat shader brushes.  Often they're proportionately shorter as compared to width of a shader brush, but neither of these examples really are, which are a Real Techniques synthetic Accent brush, and a Paula Dorf Smudge brush.  These are amazing for applying shadow around the eye, and I love them for smudging the edge of liner.  They provide more control than the previous two styles of detail brush and can be used to smudge or finesse the edges of liner.  Interestingly enough, they often make for excellent gel liner or tightline brushes.  While they do offer more control than a pencil brush, that makes them a little harder to use.
 
Domed Smudge Brush
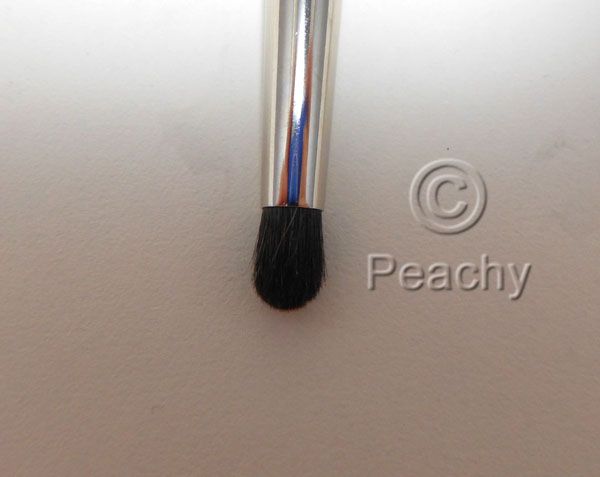
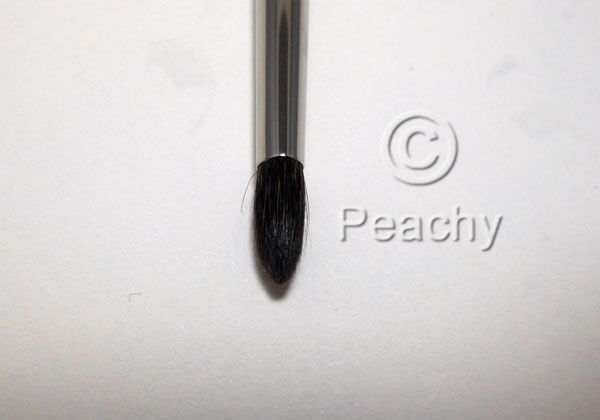
Similar to a pencil brush, but with a dome instead of a point, this Make Up For Ever smudge brush, is useful for most of the same effects, such as smudging and highlighting, only it will provide a softer less focused or intense effect.  I think this is especially useful for a smoky eye, where you want a smooth gradation of shading. 
 
Pointed Detail Brush
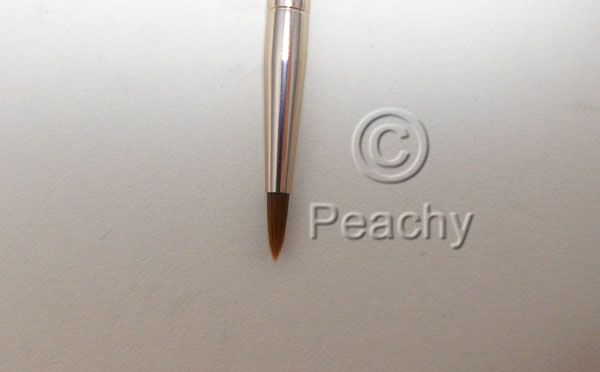
This one (a Hakuhodo 5529, blue squirrel hair) is like a long thin pencil brush.  It's less useful for smudging liner ( especially this one's soft squirrel hair), but more useful for crease work.  It provides a soft, diffused line, but with exacting detail.  Perfect when you want delicacy and precision at the same time.
 
Round Detail Brushes
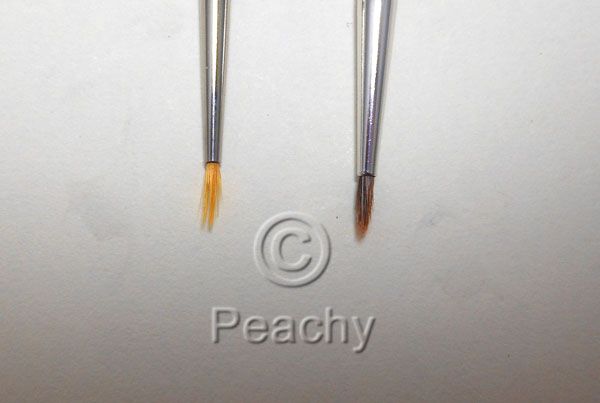
Similar, but sturdier, to the pointed detail brush, and obviously featuring a round end rather than a pointed end, these brushes (Kevyn Aucoin Small Eyeshadow Soft Round Tip, and Royal and Langnickel Smudger) are super precise crease brushes and are great for smudging around the eye and applying eyeshadow under the eye, in the outer corner, or along the top lash line. 
 
 
Pros and Cons
Pros:  These brushes do what none of the other featured brushes can do.  They are like an eyeliner brush crossed with a blending brush.  Tiny, but capable of blending small areas.  If you have small eyes, you may prefer to use one of these brushes for your crease instead of a classic crease brush.  These brushes' versatility means that you will probably want one in your brush collection. 
Cons:  They're tiny.  That's pretty much it.  If you don't want a small brush, or if you like to keep your brushes to a minimum (something which I obviously have no idea about), then you don't need one.  They're tiny brushes; that's the point, but that means they can't do the things a bigger brush does. 
 
The brushes featured in this post are: Essence of Beauty Fine Crease Brush, MAC 219 Hakuhodo G5514BkSl, Hakuhodo G5515BkSl, Sephora Point Smudge 16 (discontinued), Sephora Smokey Eye Brush 24 (from the discontinued platinum line, but the shape and number are still in the current Pro Line), Real Techniques Accent Brush (form the Starter Set), Paula Dorf Smudge brush, Make Up For Ever Smudge Brush 14S, Hakuhodo G5529BkSl, Kevyn Aucoin Small Eyeshadow Brush Soft Round Tip, Royal and Langnickel Smudger Brush.  All brushes were purchased and I received no compensation for featuring them.

Sunday, August 5, 2012

A Guide to Brushes: Eye Brushes Part 5: Liner Brushes

The next part of my massive brush series is liner brushes.

Fine Liner Brushes
The classic fine liner shape is perfect for liquid liners, here is a Kryolan synthetic fine liner brush  (that is super bent--sorry, I keep forgetting to fix that) and a discontinued NARS.  I like to use them even when the liner in question has a felt or sponge tip.  They draw a super fine line and are great for basic liner application as well as wings.  I also like using them for gel and cake liner or dampened eyeshadow.  If you want to do a really thick wing, I think you'll find it frustrating to use a brush this fine, and they're not known being beginner friendly, but still an important and useful brush.
Pointed Liner Brush
A thicker and often stiffer brush than the finer liner brush, the pointed liner brush, this one is by Laura Mercier, tapers from the ferrule, where it is round, to a thin point.  It's a great brush for thick liner and it's size makes it more user friendly than finer brushes.  It won't maneuver around the lashline as well as the finer brushes, though, but if you do "big" liner a lot, you'll probably like it better.
Gel Liner Brushes
The gel liner brush (Sephora's, a definer brush from Laura Mercier, and the Ultra Fine liner from Bobbi Brown) combines the best of both the previous brushes, it's wide at the pinched ferrule then tapers to a point, often making a triangle shape along the way.  These are often sold as or packaged with gel liners, and they really are great for them.  The unique shape offers both flexibility and stability, so they are my number one choice for beginners at gel liners.  These are also perfect for using eyeshadow to line the eye, either wet or dry.  Outside of the eye area, these brushes make for great spot concealing brushes.
Another style of gel liner brush ends in a rounded square shape; these are a soft Stila 4 and a stiffer Make Up For Ever 2s.  They are also good for gel liner, especially the MUFE one, and I love them for powder eyelining.  They are also great for blending pencils after they have been applied to the lash line.
Flat Liner Brushes
The flat liner brush is virtually a necessity if you tightline, which, in case you don't know, is to line by putting liner into the base of your lashes from underneath (it's not to be confused with lining the inner rim or waterline of your upper lashes).  A cake liner and one of these babies and you are good as gold.  They are also good for pushing liner into the lashes from above, especially a cream or gel texture or powder shadow.  Either way they give an "un-made up" look with fuller lashes.  These brushes are a Stila 13 (a little wide for my rounder eyes), a Laura Mercier, Paula Dorf, and an Ulta.
Angled Liner Brushes
Angled liner brushes are another category that multi-tasks (yes, that tiny brush on the far left is angled, it's by Sublime/Brandon, next to that is a Japonesque, MAC 266, Benefit Hard Liner, and Real Techniques Brow Brush).  These are as useful for brows, if not moreso, as they are for eyelining.  As brow brushes, they apply brow powder, powder eyeshadow, or cream and gel brow products to fill in and define the brows.  The Benefit hard angle is my usual brow brush for use with powder eye shadows and the MUFE waterproof brow corrector.  As eye liner brushes, they are commonly suggested for use with gel liner (I know MAC sales associates have often pushed it), and I have seen some great things done with them, but they do not work for me to apply my own gel liner and often apply too thick of a line for my tastes.  I do like them better when used on someone else, and they are terrific for creating a wing at the outer corners (which is why I think they are often suggested).  They are also good for applying eyeshadow as liner or for blending pencil.  I think, as a brow brush they are essential, but as a liner brush, I only suggest them if you struggle with your wings. 

Pros and Cons
Pros:  One of these liner brushes should be in your brush collection.  The fine liner offers the most control and creates a multitude of looks.  The pointed liner brush works for dramatic looks.  Gel liner brushes are (obviously) made for gel liner; they're great for beginners and offer both precision and ease of use.  Flat liner brushes fill in the lashline, making lashes look thicker without a definite line.  Angled liner brushes are superb for eyebrows and great for getting a good flick on eyeliner.  Even if you only use pencil liners, you'll probably want one of these brushes for blending or applying eyeshadow to lock it in.
Cons:  What fine liner brushes offer in flexibility they lack in ease of use.  The classic "liquid liner is so haarrd!!" cliche is probably due to this brush.  (I should probably clarify that I love this sort of brush and have used the two shown here practically to death).  The pointed liner brush can be unwieldy in it's size and stiffness.  Gel liner brushes are great, but I know some of them can splay and not offer a fine enough line.  Flat liner brushes are essentially unitaskers, and they have the problem that they must be held perpendicular to the lash line, and if you're nearsighted (as I am), you'll likely hit the brush handle into the mirror.  Angled liner brushes work for some people, but they don't work for me. 

The burshes featured in this post are: Kryolan Professional Size 0 Round Details Brush (No. 4300), NARS Liquid Liner Brush (dc'd; I don't know how the current version compares), Laura Mercier Pointed Eyeliner (from a double sided brush), Sephora Gel Liner Brush #26, Laura Mercier Wet/Dry Definer Brush, Bobbi Brown Ultra Fine Liner Brush, Stila Precision Eye Liner Brush #4, Make Up For Ever Eyeliner Brush 2S, Stila Flat Liner Brush #13, Laura Mercier Flat Eyeliner (double sided brush), Paula Dorf Eye Definer (from a set), Ulta Flat Eyeliner Brush, Sublime Small Angled Shadow Brush, Japonesque 940 Angled Eyeliner (travel), MAC 266, Benefit Hard Angle Liner Brush (this looks different on their website, no idea if it's comparable), and a Real Techniques Brow Brush (from the starter set).  All brushes were purchased and I received no comepensation for featuring them.

Saturday, July 21, 2012

A Guide to Brushes: Eye Brushes, Part 4: Angled Eye Shadow Brushes

Part four of my brush guide is angled shadow brushes.  These come in two styles: round and flat.  Think of either the blending crease brush or the flat shader brush sliced at an angle.  These are versatile eye shadow brushes, good for applying and blending eyeshadow.

Round Angled Shadow Brushes
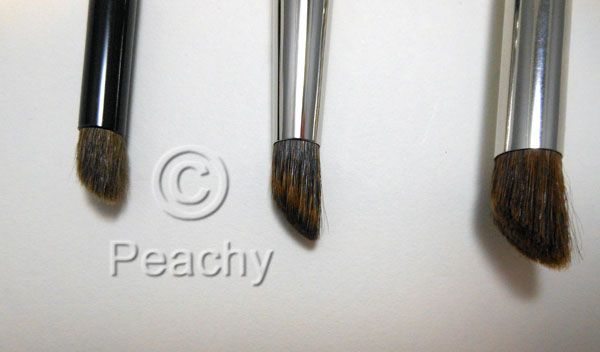
Here are three sizes of round angled brushes; they are Paula Dorf Eye Contour, Hokuhodo G515 (Canada squirrel) and Make Up For Ever 18s.  They are all good for applying eyeshadow to the crease, and the three sizes would then fit different eye shapes.  They work well in a windshield wiper back and forth in the crease.  The largest is great for softening all edges after everything is applied.  I love the smallest also for applying eye shadow to the outer corner, patting it on really gets a good dark outer corner. 
The angled shape really fits into the crease well, and is great for a defined crease.  One thing I really love about them is that, as opposed to using one of the rounder or oval blending brushes to apply to the crease, you don't really get any shadow on your lid, it stays limited to the crease and upper lid areas.  This is amazing if you have small eyes because you can create the illusion of a larger lid space.

Flat Angled Shadow Brushes
These flat angled brushes are a Hakuhodo 239 and a MAC 275.  The MAC is the second brush I've featured that I haven't actually liked, I think.  The Hakuhodo, on the other hand, is divine, so consider all the pros related to that one and the cons for the MAC.  These are good for applying eyeshadow to the crease by using the tip of the brush; the angle fits nicely into the crease.  I also like them for a soft wash, and if you want to apply a large shadow use them the other direction across the tip.
You can use these brushes just like you would a medium or large flat shader brush, plus the angle means they're better for the crease.  It's also a good shape for shading the sides of the nose to make it appear slimmer from the front, which I really need to remember to do for my photos. 

Pros and Cons
Pros:  These brushes' unique shape allows for them to fit precisely in the crease.  The shape of the round ones in particular, make for almost foolproof crease placement.  They are a great finishing brush, too, blending out any harsh lines without disturbing placement.  I love them for outer corners and creases. 
Cons:  As a more unique brush shape, they might be either hard to find or expensive.  If you're building your brush collection, they probably won't be your first priority.  I think it's definitely worth having one of these, but I think you're more likely to buy one if you find traditional crease and blending brushes not working for you. 

The brushes featured in this post were Paula Dorf Eye Contour, Hakuhodo G515 Eye Shadow Brush CM Angled, Make Up For Ever Eye Shadow Brush 18s, Hakuhodo 239 Eye Shadow Brush Angled, and MAC 275.  All were purchased and I received no compensation for featuring them in this post.


Saturday, June 30, 2012

A Guide to Brushes: Eye Brushes, Part 2: Blending Brushes 1

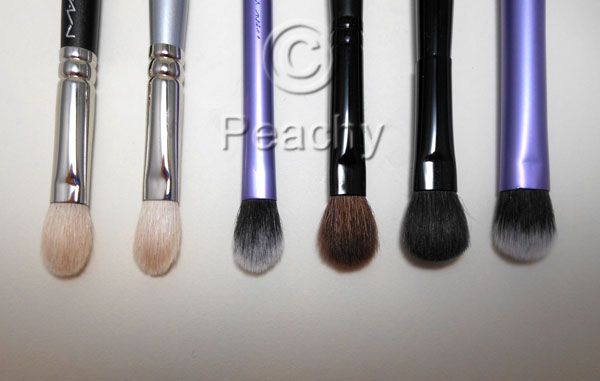
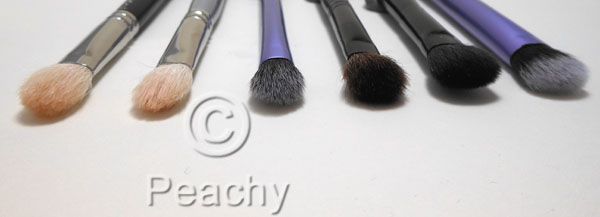
Part two of my comprehensive brush guide is blending brushes, which will be separated into two posts themselves.  This post features blending brushes with pinched ferrules, while the next post will feature round ferrules.  The pinched ferrule makes this set wider than they are thick, so they have two directions to use.  The pinched ferrule makes them similar to the previously featured flat shader brushes, but they are all fluffier and thicker, which makes them better suited to blending than the shaders are.

Fluffy Blending Brushes
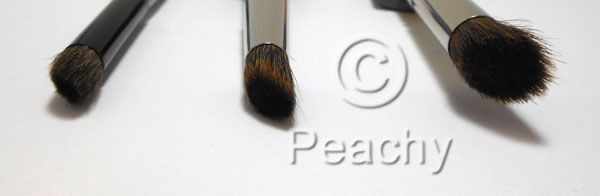
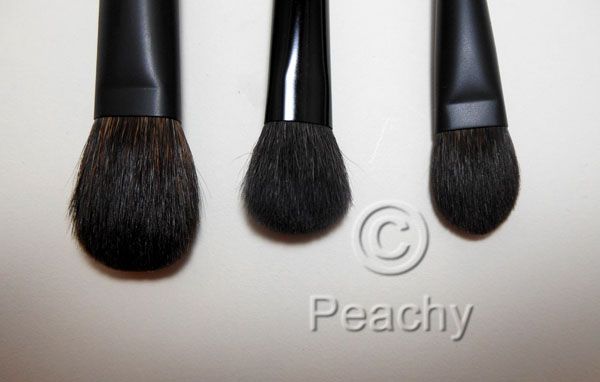
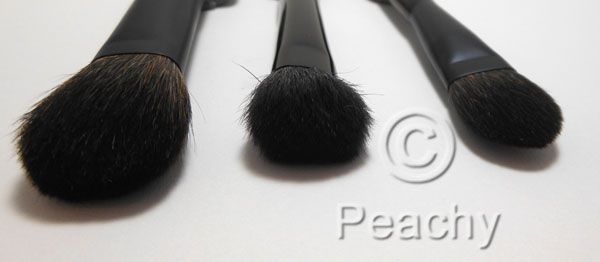
Here we have three very large blending brushes: Hakuhodo Kokutan L, Paula Dorf Eye Blender, and Kokutan MLL.  They're pretty big; the Kokutan L is an inch long, 5/8 inch wide at the ferrule and 1/2 inch thick.  The two Hakuhodos are both blue squirrel, and the Paula Dorf is soft too.  I wish all brush purveyors would list the hair type on their website.  Of course, then they might face the wrath of PETA.  Heh.  I guess you've noticed these brush posts are not for vegans.
These brushes are all super soft and great for applying a soft wash of color over the whole lid area and for all over blending. Since they're so soft, they're great for heavy handed blenders, but since they're huge, they're terrible for detail blending. I like to use them "off-book" for applying cheek highlighter, blush, and powdering small areas.

Oval Blending Brushes
The be-all and end-all of blending brushes for a lot of people, here we have MAC's classic 217, also a Sephora Pro Oval Blending brush 27, Real Techniques Base Shadow Brush, Sephora Classic blending 29, a Paula Dorf eye shadow brush (sorry; it's from a travel set I've had for forever), and a RT Domed Shadow brush.  The two white are goat hair, the two RT's are synthetic and the other two are soft hair of unknown origin.  MAC's 217 is a beloved brush by many people, for blending edges, for applying color to all parts of the mobile lid, and for applying to the crease.  I think they're great for both blending and applying to the lid, but I almost never use one for the crease.  I don't think it suits my own eye shape, but, honestly, I never use it for anyone else's crease either.  The goat is good for light touch blenders, a group to which I belong, but if you're heavy handed, you  might find the synthetics or a soft hair, like squirrel more suited to your technique.  The goat hair also holds up better to cream products.
These blenders are great for applying a smooth gradiant over the lid and into the crease, a feature lacking in flat shader brushes.  That makes these useful for smoky eyes and cat eyes (a cat eye, though often a mislabeled doe eye, which is eyeliner that flicks out at the end, is used here to mean eye shadow that emphasizes the outer corner in a point.  I suppose I could use the internet invention "outer v," but I think that would confuse you, as they're often first added with a detail brush.  Not to mention the fact that the "outer v" as a thing is both nonexistent and silly.).  An overall great blending brush and shadow brush, these are also good for concealer.

Pros and Cons
Pros:  These are  great all around blender brushes, good for both application and blending.  Very good for creating a gradiant; they work well in conjuction with flat shader brushes to create a wide variety of eye makeup styles.  The fluffy brushes will apply a sheer amount, and are good for all over blending on large eyes.  Oval blending brushes are denser and great for both applying and blending, and a lot of people use them for crease brushes too.  Look for hair types that suit your blending style; denser goat for light handed blenders, softer hairs like squirrel for heavy handed blenders.  Both types of blenders are great multi-taskers, being useful for face powder and blush/highlighter or concealer.  It's a good idea to have more than one blending brush in your collection, whether you need an assortment of sizes and shapes has a lot to do with your eye shape and what you want them for.
Cons:  I think oval blenders are ill-suited for creases, and people with small eyes or deep creases will likely agree with me.  When they are used for creases, it often results in a lack of precision.  The fluffy blending brushes are probably also too large for people with small eyes, too.  These sorts of brushes are a hit or miss; if they work for you, they are probably staples, and if you don't, you find yourself frustrated and confused why they seemingly work for everyone but you.

This post featured: Hakuhodo Kokutan Eye L, Paula Dorf Eye Blender (the eye blender currently on the website seems smaller), Hakuhodo Kokutan Eye MLL, MAC 217, Sephora Pro 27, Real Techniques Base Shadow Brush (found in the Starter Set), Sephora Classic 29, Paula Dorf Eye Shadow (from travel set, dc'd), Real Techniques Domed Shadow Brush (from Travel Essentials).  All brushes were purchased and I received no compensation for featuring them.

Monday, June 25, 2012

A Guide to Brushes: Eye brushes, part 1: Flat Shader Brushes

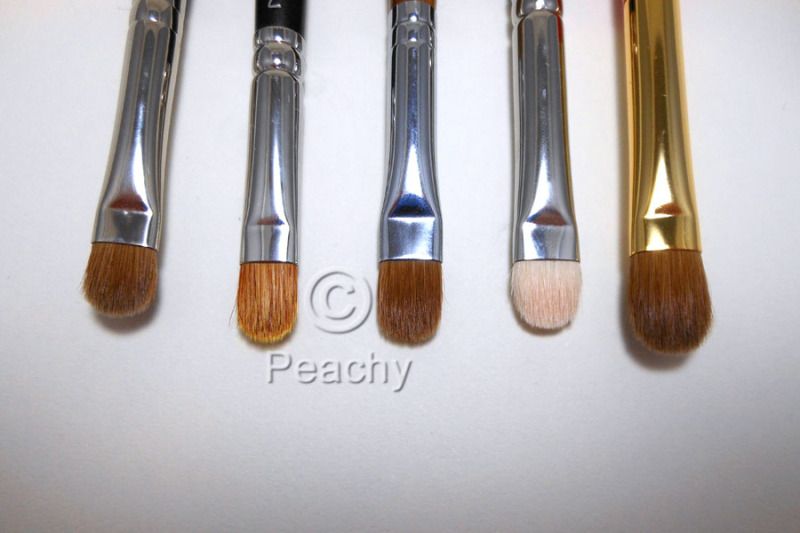
This is part one of a comprehensive series on brushes. I decided to start with the ever handy flat shader brush, sometimes called a laydown brush.  It's the most basic of all the eyeshadow brushes, and I think when you're just getting into brushes, it's probably where you should begin.  The shader brush is available from nearly every brush line at every quality level, and in every possible fiber from synthetic to goat to super high quality kolinsky.  This post will cover three sizes: small, medium, and large (okay, kind of obvious, but I could have called them Huey, Dewey, and Louie, and then you'd be confused).  I will also discuss uses for each size, brush hair, and how you should pick a shader brush.

Small Shader Brushes
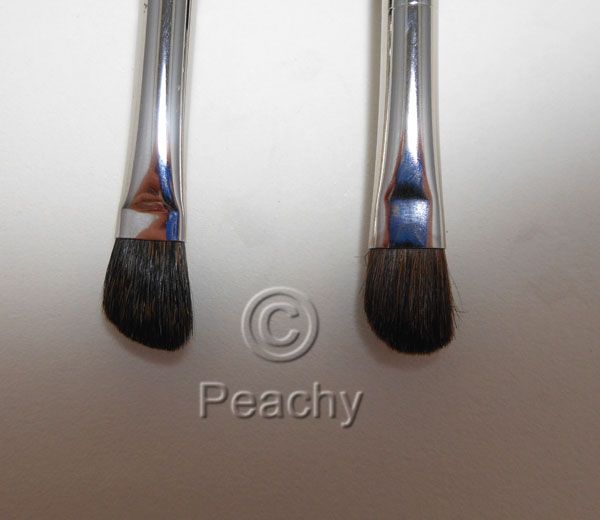
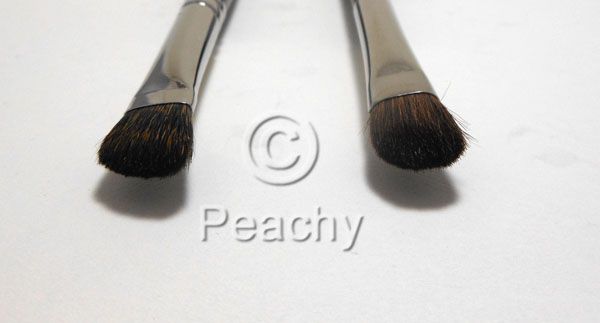
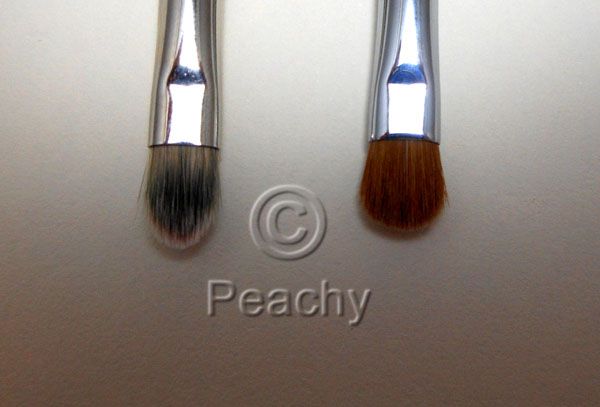
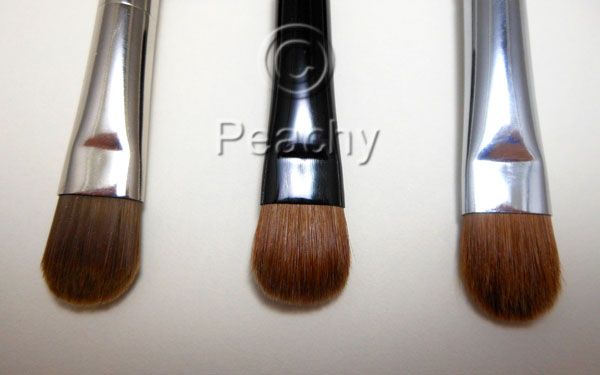
These brushes are both about 1/2 inch wide and are the smallest shader brushes in my collection.  The one on the left is a Sephora synthetic and the one on the right is a sable brush from a beauty store.  In this case, sable probably means blunt-cut, like a second from a higher quality brush.
This size is obviously good for smaller lid areas, so if you have small eyes, you might want to consider this size.  It's also good for detail work, applying eyeshadow to the inner third, highlighting the center, or darkening the outer third, as its small size ensures dense placement.  It applies a strong highlight to the brow bone and shadow under the eye to define.  This size also makes a terrific lip brush, especially for fuller lips.  I actually bought the Sephora one for that purpose.

Medium Shader Brushs
 
 
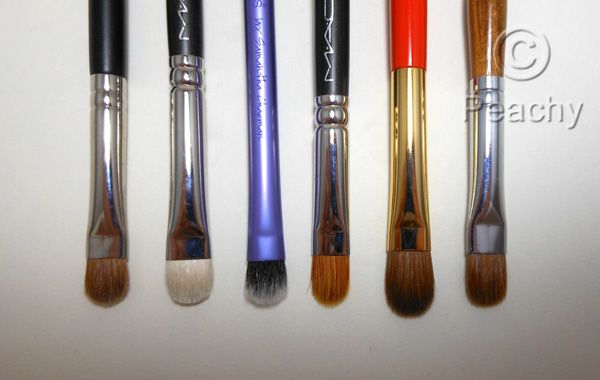
The medium shader brush is the most basic of all eyeshadow brushes.  This is the most versatile of all the sizes, and is what most people will be looking for.  This set is about 3/8ths of an inch wide, and vary in length between 3/8ths of an inch and 5/8ths of an inch. 
 
 
These are great for applying eye shadow to the lid, especially if you want to pack on color, for either a strong look or when using a sheerer shadow.  They can be turned on their side and the tip used to apply shadow in the crease or under the eye.  From left to right they are an unknown hair by Japonesque, a goat hair by MAC, Real Techniques shading brush which is synthetic, a mix of natural and synthetic by MAC, a beautiful weasel by Hakuhodo, and another sable by Brandon that I got at a beauty store more than a decade ago and was my first "real" brush.  The natural/synthetic mix is good for laying down either powders or cream, and the goat is especially good for dense applications, the weasel is amazing and applies eyeshadow super smoothly.  These are also likely going to be the brush to turn to for applying powder shadows wet for foiling or super-dense application.  They can also double as concealer brushes for applying under the eyes or on large areas for redness.

Large Shader Brushes
These large brushes are about 1/2 inch wide, and are synthetic MAC, mix of synthetic and natural by Paula Dorf, and sable by Brandon. 
These are good for applying a base, either cream or powder.  Even though they are very wide, they are still flat, so they apply more product to the lid than a fluffier brush would.  This makes them great for something like a MAC paint pot, when you want to apply a thin but very even layer.  They also work well, obviously, for someone with a large or flat eye area.

Pros and Cons
Pros:  The flat shader brush is easy to use and versatile.  It's good for basic looks or as a base or detail brush for more complicated makeup.  They work well for wet or dry application and, depending on the hair type, are appropriate for cream shadows. They can double as concealer brushes and lip brushes.  They are useful for applying shadow to nearly every part of the eye area.  A shader brush is likely available in every line and price range, is often the core of the line, such as the Shu Uemura Natural 10, or the MAC 242, 239 etc. 
Cons:  These are not blending brushes.  While they can soften the demarcation between two colors applied to the mobile lid, these won't work well to blend a gradiant, so you'll need to use another brush to blend (fortunately, blending brushes will be the next brush types featured).  While they make for surprisingly good crease brushes when the tip is used, most eye shapes will prefer to use a separate crease or blending brush there. 

I fully believe a flat shader brush should be everyone's first eyeshadow brush.  These three sizes were my first three brushes, and I still remember the pride that my eyeshadow finally looked the way I wanted it to.  Choose one that fits your eye size, your budget, and how you want to use, and you will likely find yourself using it every day, whether your eye makeup is subtle or exciting.

The brushes featured in this post are: Sephora Synthetic Eyeshadow 18 (dc'd), Brandon Mini Shading Brush, Japonesque Eye Detailer Medium, MAC 239, Real Techniques Shading Brush, MAC 242, Hakuhodo S132, Brandon Fluff Brush, MAC 249, Brandon Shading Brush, Paula Dorf Wet/Dry Eye Color.  All were purchased by me and I was not compensated for this post.  One caveat:  the Brandon brushes I own were bought more than a decade ago, while they still have brushes by the same name available, I make no promises that they are the same brushes featured here.

Wednesday, March 7, 2012

Maybelline Color Tattoo 24hr Cream Gel Shadow Review and Swatches


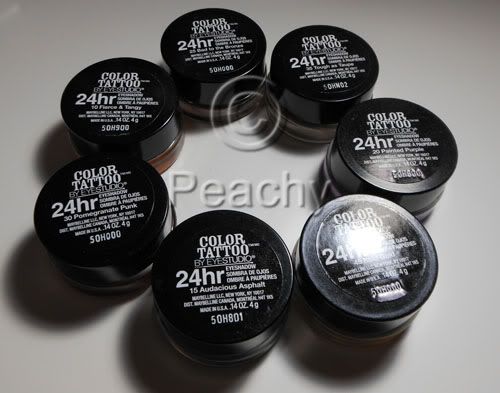
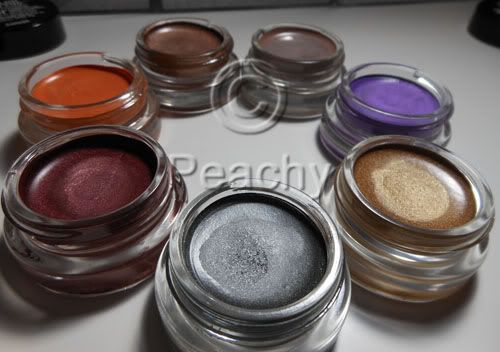
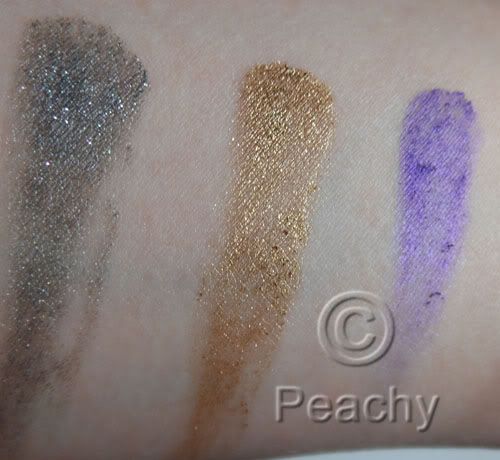
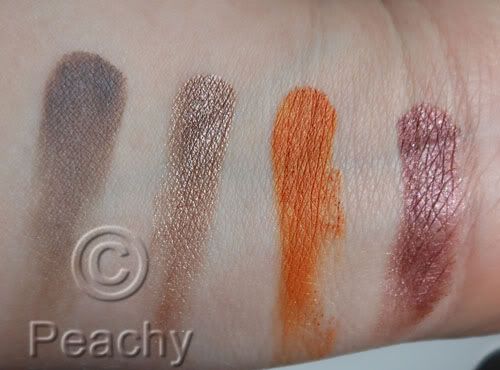
I bought 7 of these: Audacious Asphalt, Bold Gold, Painted Purple, Tough as Taupe, Bad to the Bronze, Fierce and Tangy, and Pomegranate Punk.

These have been compared to MAC's Paint Pots, but to me, the comparison isn't great. The Color Tattoos are both softer and less creamy than PPs, more gel than cream. When I used one of my favorite brushes to apply PPs, the Sonia Kashuk Synthetic Domed brush, it pretty much dug a hole in Tough as Taupe. Of course the colors hardly compare to the permanent line of Paint Pots most of which are neutral colors and used as powder eyeshadow bases. Few of these are neutral and none of them resemble anyone's skin tone. I believe some might be similar to LE PPs, like Artifact and Pomegranate Punk, but I don't have any of them, so I'm not the person to tell you. If you're looking for a cheaper alternative to Paint Pots, a dupe if you will, don't get fooled by the little glass pots, these aren't the same.

So, now that I've got the inevitable Paint Pot comparison out of the way, let's see how these fare on their own merits. They promise 24hr wear; I hate when marketing makes outrageous claims, even if they are based on lab research. These don't last on me, but not a lot does. Some of the Make Up For Ever Aqua Creams do, but not all of them, MAC Paint Pots don't, Benefit Creaseless Cream shadows don't, though I haven't tried those since they reformulated them and ditched all the awesome colors they used to have, UD Primer Potion doesn't make powder shadows last either. I am cursed with oily lids and eyelids that cause a lot of migration (slightly hooded, with really narrow and deep creases). I've barely gotten four hours, let alone twenty four. I've tried on their own, layered with primer, layered with powder shadows, and layered with primer and powder shadow. I've applied with my fingers, flat brushes, fluffy brushes, synthetic brushes, natural hair brushes, a mix. The best results I had were applying with a synethic/natural hair mix fluffy shader brush over NARS Smudgeproof Shadow Base topped with Powder eyeshadow, like here http://www.bepeachy.blogspot.com/2012/03/estee-lauder-mad-men-collection.html. After a few hours, one eye was pretty intact, while the other had creased. I know other people don't have this problem; a friend who suggested Bad to the Bronze wore them all day. I think if things don't normally crease on you, these probably won't either. If you get creasing due to oily or sweaty eyelids, these probably won't crease. If creasing is a regular occurance, even with creaseless products, I think you'll still have creasing with these.

Very few of these products are a swipe-and-done sort of eye look; pretty much Bad to the Bronze the only one I think anyone would feel comfortable with on its own, though I'd wear Audacious Asphalt, too. The rest would likely be used either in conjunction with another or with a powder shadow layered over it. Tough as Taupe is great as a layer beneath any and all taupe shadows, for creating a neutral base underneath warmer shadows, especially if they turn orange on your skin, or for adding depth to the crease. Some of the shimmery shades don't build up well; neither Pomegranate Punk nor Bold Gold were able to be layered to full opacity, as if the act of applying more (with finger or with brush) took off what was already there. I tried an eye look layering the two together and it was an unmitigated disaster. I was actually kind of bummed, as I bought them for that exact look.

It's rather interesting that Maybelline would choose to launch the product with so few "wearable" shades. Most companies have a core color line of neutrals with a few colors thrown in, while these have a teal, a green, a purple, an orange, and a burgundy right from the start. It's lacking "skin tone" colors such as beige, caramel, and brown tones in either shimmery or matte finishes. I think it's a great thing for lovers of colors, but I also think that most women want a simple and pretty look that doesn't require as much thought as most colors require.


L to R: Audacious Asphalt, Bold Gold, and Painted Purple. Audacious Asphalt is a shimmery gray, it has good payoff and could be used on its own if you like cooler colors. Bold Gold is an almost glittery cool gold. The payoff was lacking and I couldn't layer it to get full opacity. Painted Purple is downright terrible. Very little payoff, an almost lumpy texture, which you can see in the swatch, and what you've already applied disappears as you try to apply more to even it out. That it's a lovely shimmery violet is pretty much irrelevent since it won't actually apply.
L to R: Tough as Taupe, Bad to the Bronze, Fierce and Tangy, Pomegranate Punk. Tough as Taupe is a matte grayish-taupe. On my skin it's a taupe, but I've heard other people describe it as a cool-toned gray on theirs. It has great payoff. Bad to the Bronze also has great payoff. On me it's a metallic rose-gold shade with a definite warm undertone, but again, I think your skintone varies the color a lot, because on the friend who recommended it it was much more of a golden taupe. Fierce and Tangy is a satin finish golden tangerine shade; there is a small amount of shimmer. It has amazing payoff; it would be the first I'd recommend buying if I thought it was a color most people wanted to wear. Pomegrante Punk is a shimmery to metallic burgundy color; there is a hint of warm brown, especially around the edges. I had trouble layering this one to opacity.
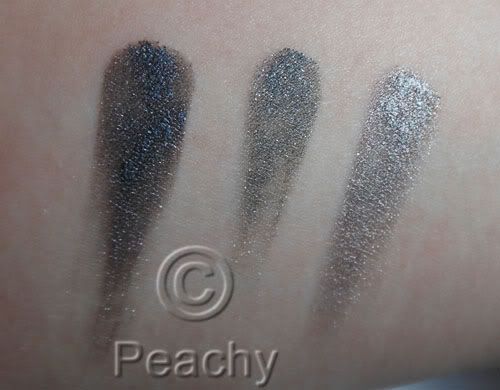
A comparison of MUFE Aqua Cream 1 Anthracite, Audacious Asphalt, and Aqua Cream 2 Steel. Anthracite is much darker, almost black in comparison to AA, while Steel is much more reflective and metallic, lighter, and, though it isn't obvious in this picture due to the reflection, slightly warmer.
Overall, I'd say these are a step up from most drugstore products, especially where cream eyeshadows are concerned. They vary greatly from color to color, though, and I'd recommend some and not others. I would suggest Bad to the Bronze and Audacious Asphalt, especially if you are looking for a cream shadow you can wear on its own for a simple day look. I'd also recommend Tough as Taupe, especially if you love taupes like I do. I'd also recommend Fierce and Tangy as its the best quality of the seven I have, but only if you want orange eyeshadow. I tried it as a blush and I think it would work only if you have super oily skin or over a rich cream as it just won't blend over the skin. I think Painted Purple should pretty much be taken off the market and reformulated, it's terrible and useless as even an eyeshadow base. The others depend how much you want the colors.