Tuesday, January 22, 2013

A Guide to Brushes: Concealer Brushes

Concealer Brushes are used to apply concealer.  I'm making this real difficult, I know.  This post features brushes for applying undereye concealer, blemish concealer, concealing redness around the nose, or anything else you might want to hide. 
 
Medium Concealer Brushes
The most classic of concealer brush, the medium concealer brush, here a Paula Dorf Camouflage brush, Sephora Classic Concealer, and Sephora Platinum concealer, resembles a flat eye shader brush, but is usually synthetic, as these three are.  Good for basic concealing on blemishes, under the eye, or around the nose.  I think they work best for redness or under the eyes, as I prefer a more precision brush for blemishes.  I like these best with cream concealers, as I prefer smaller brushes with harder concealers (like Laura Mercier Secret Camouflage) or liquid concealers (like Make Up For Ever Full Cover), but they are nice to blend after those are applied. 
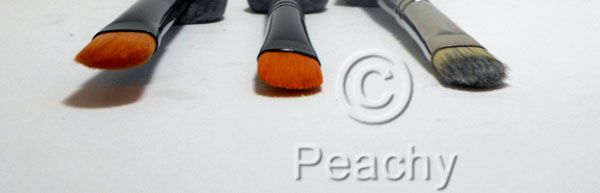
 
The medium concealer brush is also useful as an eyeshadow brush (no surprise, since it so resembles an flat shader).  They're nice for applying cream eyeshadow (which reminds me I'd like to do a post on cream eyeshadow....), and can be really useful for applying those pressed loose powder products like Armani Eyes to Kill Intense and L'Oreal Infallible, since they're usually stiffer than natural bristle brushes.
 
Large Concealer Brushes
 
The large concealer brush is a larger version of the medium; these are Hourglass Large Concealer and Cover FX concealer brush both synthetic.  They work well for applying foundation as concealer, such as a cream or stick foundation.  They are also good for applying concealer over redness around the nose or on the cheeks, highlighting cheekbones or that triangle highlight everyone associates with Kim Kardashian even though Kevyn Aucoin was doing it on celebrities and models 20 years ago.  I also use them often for blending blemish concealer over my chin, if I'm using a more emollient concealer, like Kevyn Aucoin Sensual Skin Enhancer.
 
Small Concealer Brushes
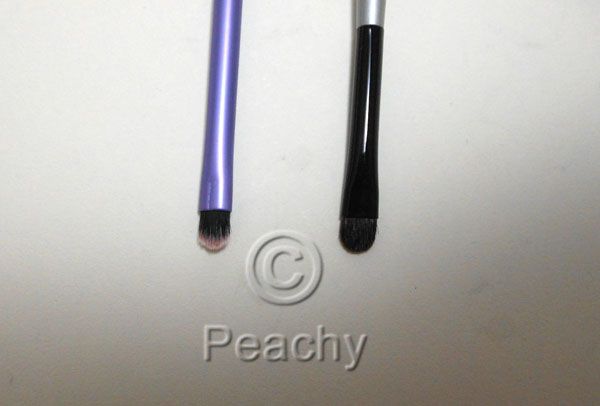
The smallest of the flat synthetic concealer brushes, these are by Japonesque and Real Techniques.  These are good for applying concealer to blemishes, especially the big swollen kind.  They also make great lip brushes, which is probably what I use them for most.  They can also be used for detail work with cream eyeshadows.
 
Fluffy Concealer Brushes
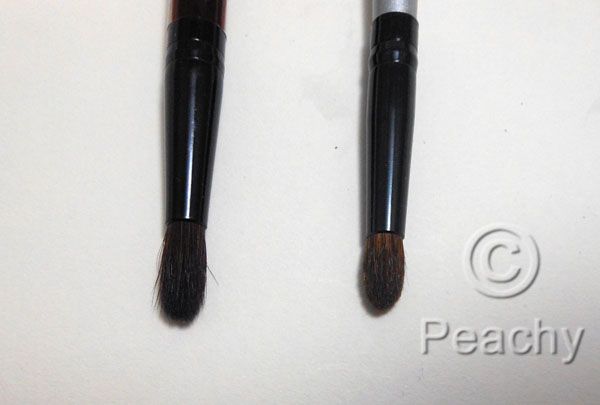
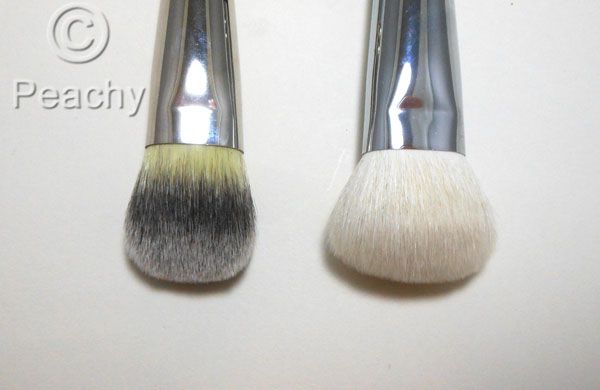
These are a Real Techniques Deluxe crease brush (also featured in the blending brush breakdown), and a Sephora Platinum Airbrush Concealer brush.  A lot of people also use eye shadow blending brushes, like oval blending brushes (MAC 217 and its dupes) or round crease brushes (MAC 224 et al.) similarly.  These are good for applying concealer under the eyes, and blending concealer over large areas of blemishes.  I like to use these with creamy or liquidy concealers, and I find them completely useless with hard concealers (like LM SC, mentioned previously).  They are great for blending, all formulations, though, and I like to use the Sephora like a mini buffing brush to apply something like KA SSE as a spot foundation. 
I think these are really useful brushes, as they're like tiny foundation buffing brushes, so I think they're easier to use and require less skill to apply and blend concealer. 
 
Long Concealer Brush
This Bobbi Brown Concealer brush (synthetic), is meant for applying undereye concealer, and I tend to use it exactly how Bobbi Brown intended (with her creamy concealer/corrector).  It's longer and thinner than the flat concealer brushes, and I can't imagine it being good for blemishes, though I am quite fond of it for creamy undereye concealer.  It doesn't blend well, though, so it requires the use of a fluffier brush or fingers to blend the edges.
 
Pinpoint Concealer Brush
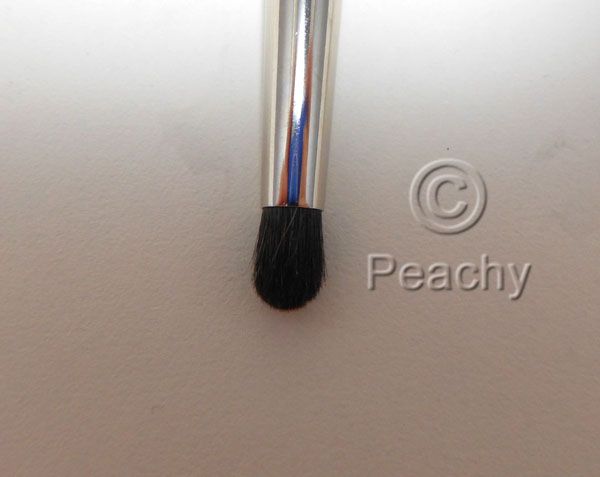
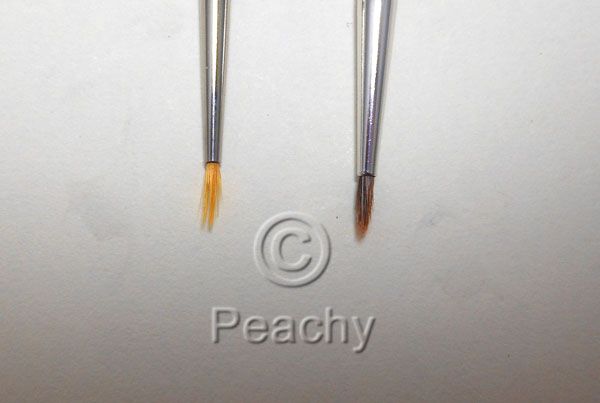
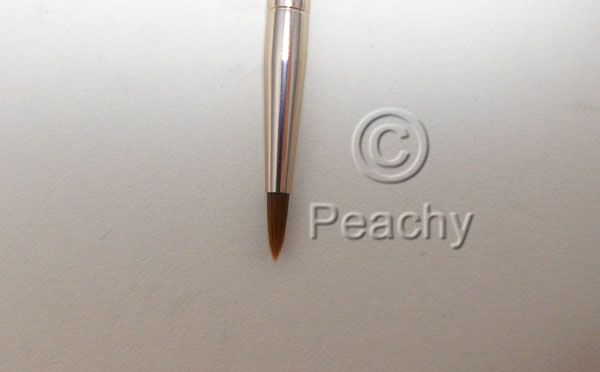
The pinpoint concealer brush, this one by Kevyn Aucoin, is a must for precision blemish concealing.  I should say, this sort of shape is essential, but you may notice it's resemblence to gel liner brushes.  In fact, you may notice Lisa Eldridge, the queen of pinpoint concealing, using liner brushes to do so.  I'll include liner brushes in this idea, so don't think you need to buy this brush (I do have to make a massive recommendation for this brush though; it is truly phenomenal.  It really glides over the skin, as it's very dense and just the perfect stiffness.  I have honestly not used another brush to conceal zits since I purchased it).  
The tiny little point you see in this photo really allows the tiniest amount of product in exactly the place you need it, which is why this type of brush is so amazing for pimple coverage.  It works with all styles of concealer, and is especially good for really pigmented concealers, be they waxy or emollient.  It can deposit such precise amounts and placement, blending is barely necessary, though, especially if your concealer is not a perfect match, you may need to scribble a bit around the edges, and use a blending brush.  I often just press or pat the product into the skin with my fingers to blend, though.
 
Point Concealer Brush
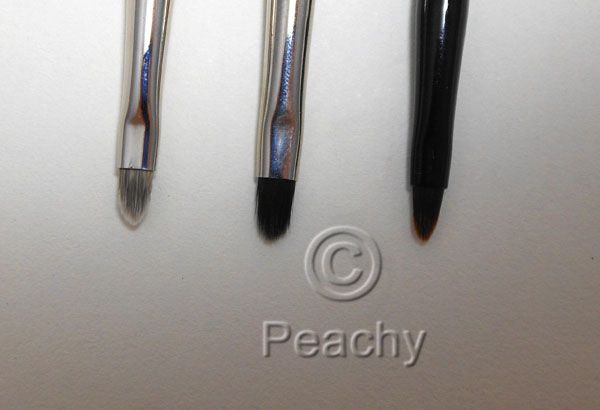
Another great brush for concealing blemishes, it's wider and longer than the pinpoint concealer brush, but still tapers to a thin point.  This Laura Mercier Secret Camouflage brush is intended for use with her Secret Camouflage, and it really does work best with hard concealers like that. 
 
 
Pointed Concealer Brush
This is the concealer half of the Stila One Step Complexion Brush, this is a less fluffy version of the fluffy concealer brush.  It's good for under the eyes, around the contours of the nose, and for blending concealer on blemishes.  The tapered point allows more control, but less blending than the fluffier brushes. 
 
 
Square Concealer Brushes
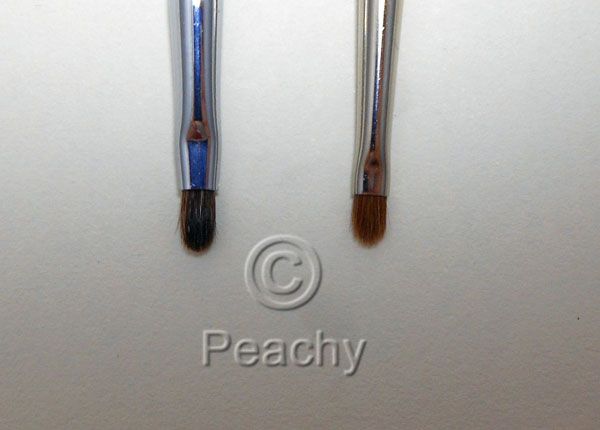
This is an old Urban Decay Concealer Brush from an early brush line and a NYX small concealer brush.  The narrower square brush is good for spot concealer on blemishes, and the wider one is good for a dense application in a small area.  Not an essential brush, though the Urban Decay brush was one of my very first brushes over a decade ago and I still sometimes use it to stipple concealer on a zit, especially one that has dried out a bit (nicer to say that than "crusty and gross"), though it has been long discontinued.
 
Pros and Cons
Pros:     You can apply concealer with fingers, but it's still one of the first non-powder brushes you'll want.  A concealer brush provides more accuracy, better blending, and less wasted product, than using fingers.  Do you need every one of these styles?  Unless you're obsessed like I am, no.  The most useful of these are the pinpoint, point, and fluffy concealer brushes, and with either tiny brush and the bigger fluffy one, you'd be able to conceal anything, whether it's a blemish, undereye circles, or redness, and they'll work with pretty much any formula concealer you use (though with drier consistencies, the fluffy concealer brush would be just a blending brush).
Cons:     This is one of those situations where the most classic brush is one of the least useful.  Though the classic brushes are still useful, for under the eyes or blending, it's not likely to be essential.  In fact, they're probably better as a laydown brush for cream or loose powder than for concealer. 
 
The brushes featured in this post are:  Paula Dorf Camouflage Brush (from Travel Set), I think this may be discontinued, as I think the "Total Camouflage" brush currently on the website seems bigger, Sephora Classic Concealer 46, Sephora Platinum Concealer Brush 45 (The entire Platinum line was discontinued and replaced with the Pro line, this one appears to have changed shape in the switchover), Cover FX Concealer Brush, Hourglass No. 8 Large Concealer Brush,  Japonesque Concealer Brush from Touch Up Tube, Real Techniques Detail Brush (from Core Collection), Real Techniques Deluxe Crease Brush (from Starter Set), Sephora Platinum Airbrush Concealer 57 (This is carried over into Pro line), Bobbi Brown Concealer Brush, Kevyn Aucoin Concealer Brush, Laura Mercier Secret Camouflage Brush, Stila One Step Complexion Brush 33, Urban Decay Concealer Brush, long, long ago discontinued, NYX small concealer brush.  All were purchased and I received no compensation for featuring them.
 

Monday, December 3, 2012

A Guide to Brushes: Stippling/Duo-Fibre Brushes

Stippling/Duo-Fibre Brushes
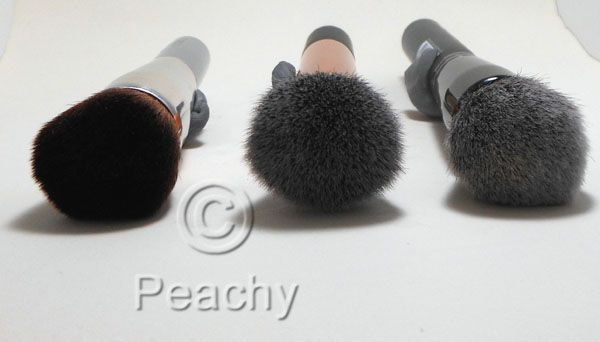
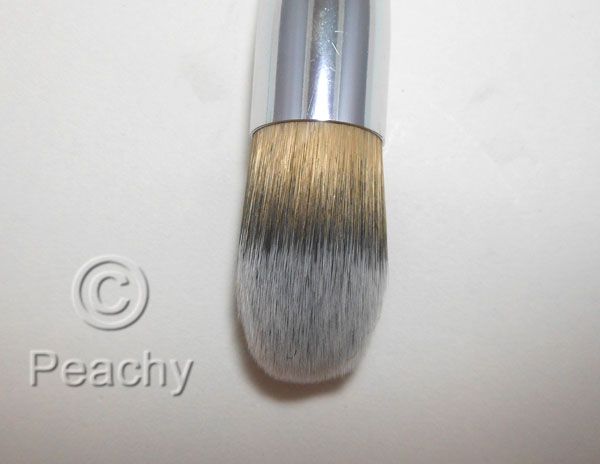
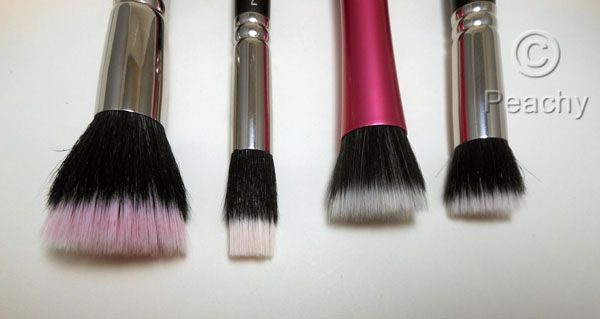
Duo-Fibre brushes are a mixture of two types of fibre, usually goat and synthetic, though two types of synthetic can also be mixed, like in the case of the Real Techniques Stippling Brush.  This mix of fibres allows for the bounce and resiliency of natural fibres with the softness of synthetic.  This mixture makes them good for stippling, as the bounce the goat gives heft to what would otherwise be a synthetic brush (which sometimes has the tendency to splay and flop).  Therefore, they are popular for foundations but are also good for cream and powder blushes, mineral products, bronzer, and anywhere you'd like to make a pigmented product go on more softly.  Because of the similarity of these brushes, I'm mostly going to talk about size differences (flashbacks to the very first brush post on flat-shader brushes....).
 
Large Duo-Fibre Brush
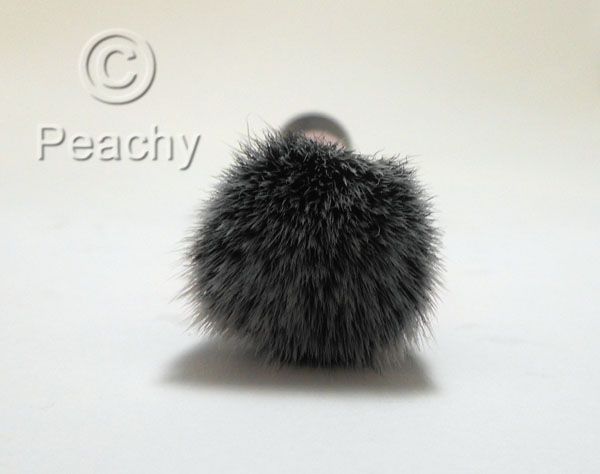
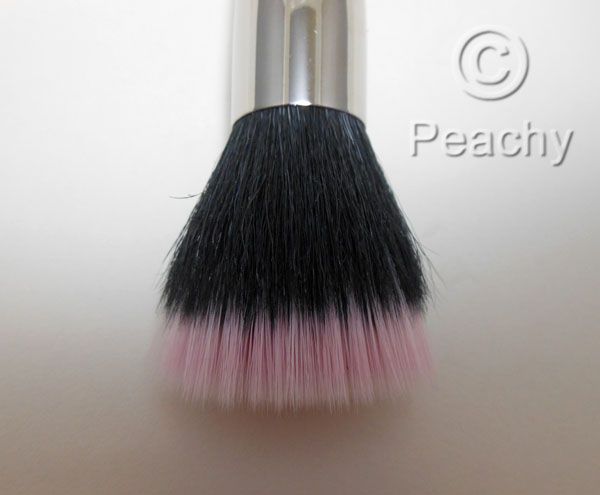
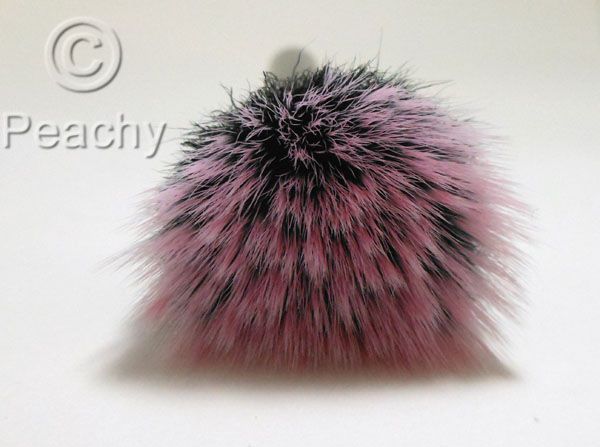
Here we have MAC's 187 brush.  I apologize that it is stained pink, but it won't come clean no matter how many times I use cleansing oil on it.  At least the staining indicates for what I use this brush most, which is blush.  It's great for a large blush application of a very dense blush.  I think this staining might be Illamasqua Panic.  It's also a popular one for foundation, though I don't quite get the stippling of foundation.  As I am theatre trained, for me, stippling is used to add natural veining effects, or to tone down shading, or add more red tones to old age makeup, places where the goal is to retain or create a texture, exactly the opposite of what you want in your foundation.  Then again, though I've heard of people claiming to stipple their foundation with these things, I've only seen people use these to buff, which in my opinion is better done with a denser brush. 
With powder or cream color cosmetics the stippling can create a translucent blush effect, so these brushes are great for that. They also work well for a very light dusting of bronzer or contour. They are often marketed with mineralized makeup, like MAC's Mineralized Skin Finishes, since those type of products can deposit too much product on denser brushes.  The large duo-fibre brush creates a diffused application over a large area.
 
Medium Stippling Brush 
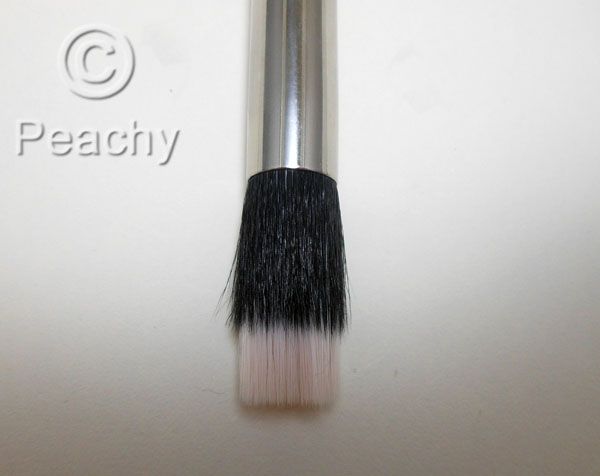
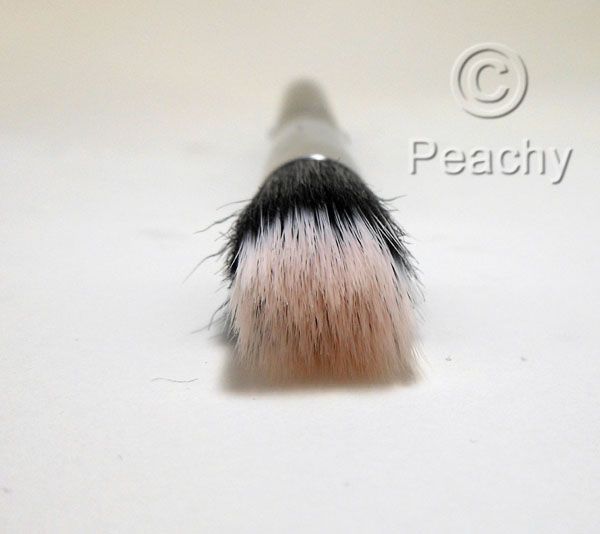
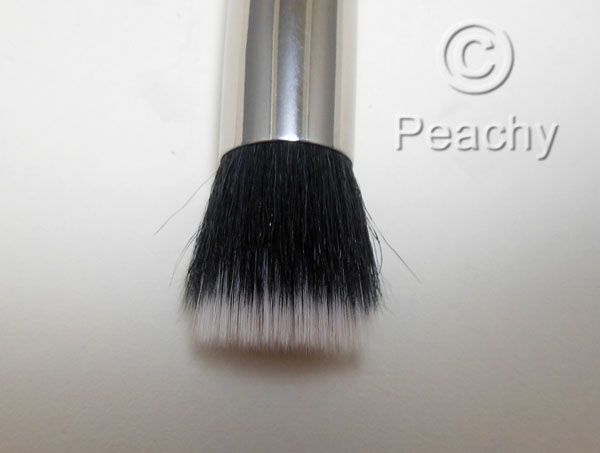
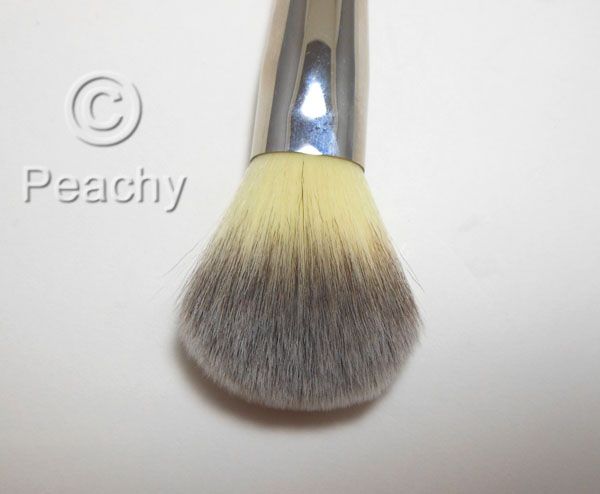
The Real Techniques Stippling Brush is much denser than the 187, it also has a shorter distance between the black fibres and the white fibres, both of which are synthetic.  This makes it work more like a flat top buffing brush than a stippling brush.  This works very well for foundation, as well as cream blush application, but, unless you want a very dense application, I wouldn't use it for powder blush.
 
 Small Stippling Brush
 
This brush, MAC 188, is a thinner version of the 187 above.  It has a farther distance between the two types of hair than the RT brush, so it is a bit floppier as well as thinner.  A lot of people also use this brush for liquid foundation.  I prefer it for blush, and often apply with this and blend out with the 187 for a bit more control than the 187 offers.  It's also great for highlighting cheekbones.
 
Short Stippling Brush
The MAC 130 is probably my favorite of all of these stippling brushes.  It's wider than the 188, but very short and denser.  It has fewer hairs I'd say than the RT, but since they are shorter, they are a bit stiffer nonetheless.  I imagine it would be great for cream foundation, as MAC often markets it for, and I absolutely love it with cream and liquid/gel blushes.  If I'm wearing a cream blush or a MUFE HD blush, I've likely applied it with this one.

 
Pros and Cons
Pros:     These brushes are versatile and useful.  The less dense, longer white bristled brushes are great for applying powder products sheerly, while the denser, shorter brushes are great for liquid and cream foundations and cream blushes.
Cons:     I don't think the aforementioned less dense brushes are good for liquid foundations.  The largest can be unwieldy to use for blush, unless you have a larger face or like blush over a large area--like I do. 
 
The Brushes featured in this post are the MAC 187 Duo Fibre Brush, Real Techniques Stippling Brush, MAC 188 Small Duo Fibre Face Brush, MAC 130 Short Duo Fibre Brush.  All were purchased by me and I am not compensated for featuring them.

Saturday, October 13, 2012

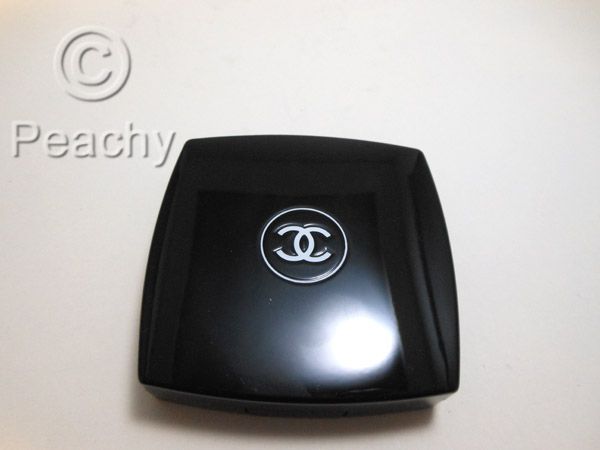
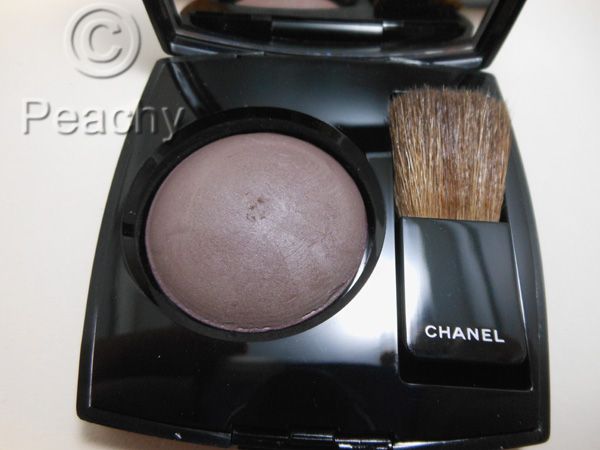
Chanel Notorious Ombre Constraste Sculpting Veil for Eyes and Cheeks

 
Contouring often offers a few problems. Do it wrong and you may end up with orangy-brown stripes along your face. To make it worse, so-called experts often suggest bronzer, as if a product designed to add a sun-kissed glow to skin (not to mention they often have shimmer) would also be the same shade to create natural and flattering shadows. Leave it to Chanel to create one of the few contouring products that leans so cool it's actually a lavender-gray.
It looks like it should be an eyeshadow--and it can be--but aren't we all much more fascinated by its use on the cheeks.  The texture is super powdery.  Just touching my brush, a Hakuhodo large pointed yachiyo, kicked up a bunch of product.  It clung well to the brush, though, and even after dabbing the majority of it onto the back of my hand, I had more than enough product left.  I do suggest applying and blending with a clean brush, reapplying, blending more to gently build up the color, especially on fairer skins.
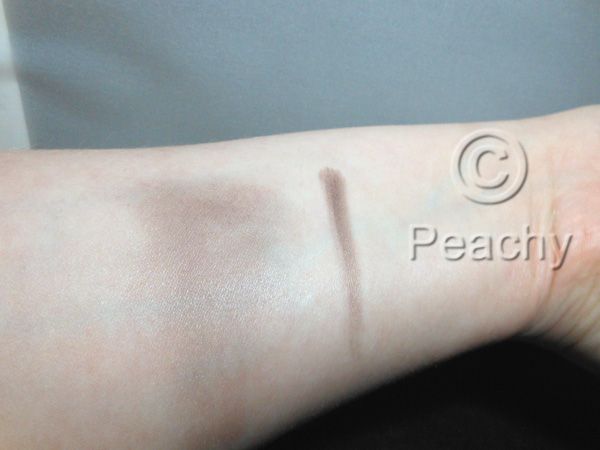
The heavier swatch almost looks purple on my inner arm here, but you can see it blends out to a very natural shadow color.  I think if you find yourself frustrated by the shades of contour available, this might be your answer.  It may look in these pictures that there's shimmer to it, but there's not really.  There's a satiny sheen to it, very skinlike in my opinion.
An incredibly unflattering angle for a cheek swatch--a bit washed out from the flash, too, so I apologize.   
And my full face picture.  I meant to apply an extra coat of concealer under the eyes before I took this picture.  Just look at those bags!  The result of a nasty little head cold, lots of stress, and nowhere near enough sleep.  I used Chanel Notorious as contour under my cheekbones, around my nose, and in my creases and under my eyes.
Face:  Kevin Aucoin Sensual Skin Enhancer SX5, Sephora Microsmooth Powder Light 05 Porcelain.  Make Up For Ever Velvet Finish Compact Powder in 24 in the T-zone.  Tarte Amazonian Clay Long-Wear Blush in Dollface on the cheeks. Chanel Notorious.
Eyes:  Chanel Notorious in the creases and under the eyes, MAC Painterly Paint Pot on the lids, and
Ultraflesh Black Magic Matte wet/dry powder liner on the upper lash line, smudged quite a bit.  Benefit Bad Gal Lash mascara on top and bottom.  Make Up For Ever Aqua Brow in 10.
Lips:  Guerlain Rouge Automatique in 160 Bal de Mai.
 

Friday, September 28, 2012

A Guide to Brushes: Foundation Brushes

Having finally finished with eye brushes, we have now moved on to brushes for the face.  I'm starting this series with the ever useful foundation brushes.  Now, you can apply foundation with your fingers or a sponge, but at some point most people will at least try a brush.  Most of these brushes are good for liquid or cream foundation, some are good for powder foundations, but an upcoming post will focus on powder brushes, so if you're looking for a powder foundation brush, you may also want to check out that one once it's up.  You'll also notice stippling brushes are not featured, though a lot of people use them for foundation; stippling/duo fibre brushes will have a post of their own along the way.
 
Flat Foundation Brushes
The classic foundation brush, this brush is usually used to stroke foundation on the face, rather than buff or stipple it.  It can leave streaks, but those are usually a result of using too much foundation, as they work best with small amounts and thin layers.  They also have the benefit of not irritating sensitive skin as buffing foundation can do.  If you're sensitive or dry, either one of these or a sponge will be your best bet.  I like these for liquid foundation quite a bit, especially thinner formulations; they are also good for cream foundations.  The smaller ones make for good concealer brushes for use in large areas.
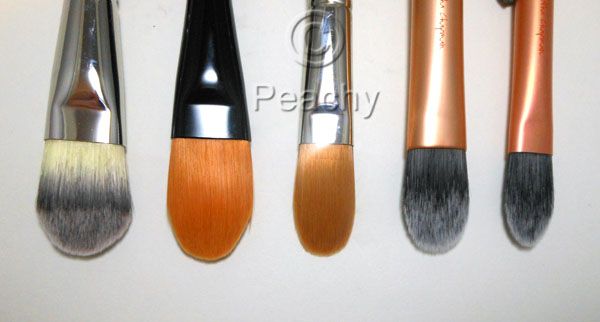
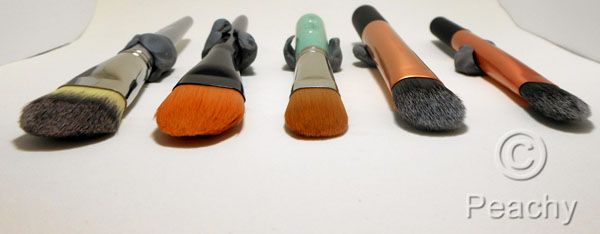
From left to right: Sephora Platinum Foundation Brush, Paula Dorf Foundation Brush, Body and Soul Foundation Brush, Real Techniques Essential Foundation Brush, Real Techniques Pointed Foundation Brush.  These are all synthetic, and the orange are taklon while the two-color ones have been distressed  at the tip to aid in product pick up.  Smaller versions fit around the nose and under the eye, while the bigger brushes make for speedy work applying foundation.
 
Buffing Brushes
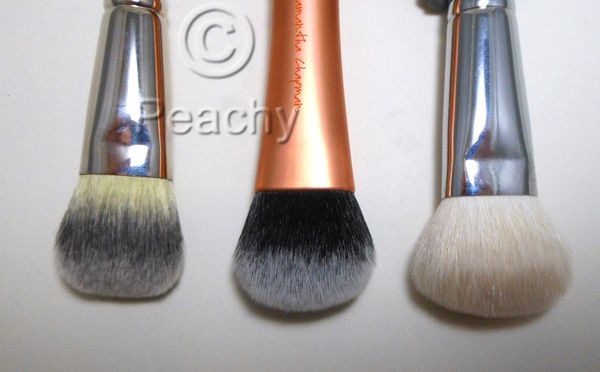
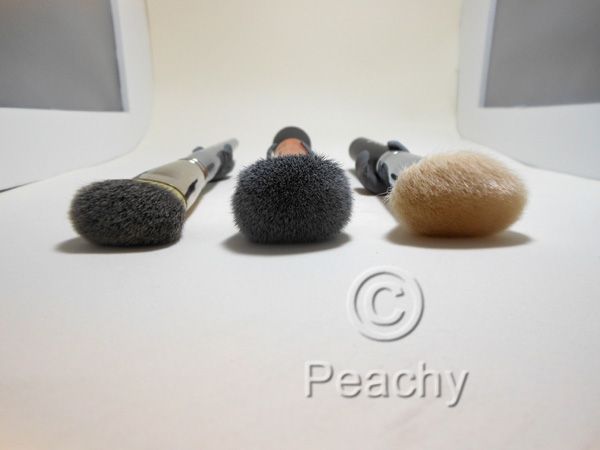
L to R: Cargo Magic Brush, Real Techniques Buffing Brush, Sephora Classic Mineral Powder.  I mentioned at the top that some of these brushes are good for powder: here they are.  These are great for getting good coverage and a flawless finish from a powder foundation; I imagine they're equally useful for mineral powders, though I have never used a mineral foundation.  They are also perfect for liquid foundation.  These buff foundation into the skin, so they're great for thick, dense, or cream foundations, allowing them to blend into the skin and either sheering down or building up the coverage.  I feel for thinner liquid foundations, they can remove as much as they apply, but I know plenty of people who use them for thin liquids, too, and they like them.
Buffing brushes are a great all around foundation brush, and they can also apply blush, cream or powder.  When I'm travelling, I often pack MAC Studio Fix plus powder and a blush and one of these brushes, and that's it.  I get really good results, and, if I'm wearing my glasses, I probably don't need eye makeup.  These can also blend foundation that's been applied with another brush or fingers.
 
Airbrush Foundation Brush
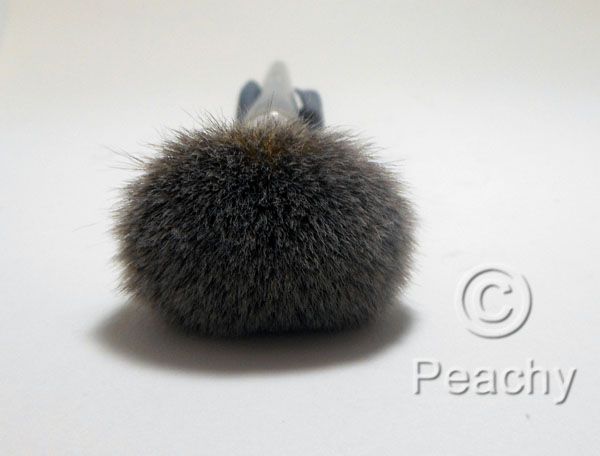
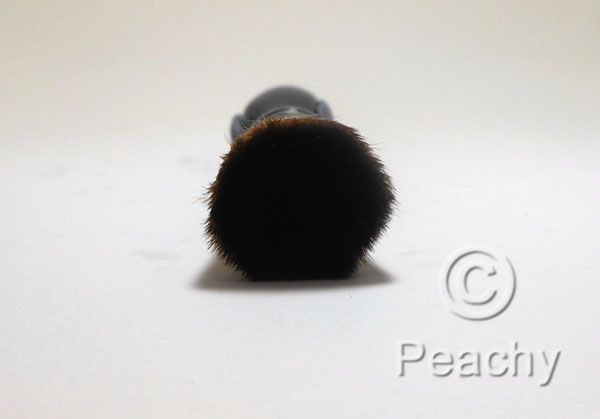
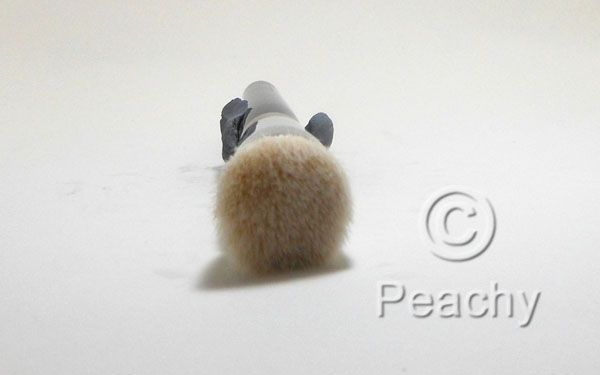
A big, fluffy foundation brush (also a powder brush) by Sephora, is also synthetic, like all the brushes featured in this post.  It deposits a fair amount of product, so you get good coverage from most liquids, but it also blends lightly.  It reminds me a bit of a stippling brush, but without the streaking often associated with those brushes, or like a much less dense buffing brush. 
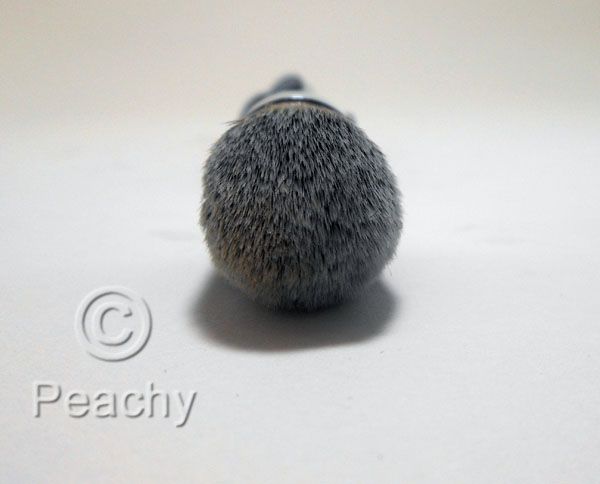
If you compare the above picture with the end picture of the buffing brush, you'll see how much fluffier it is than the latter.  It has a very light touch.
 
Flat-topped Foundation Brush
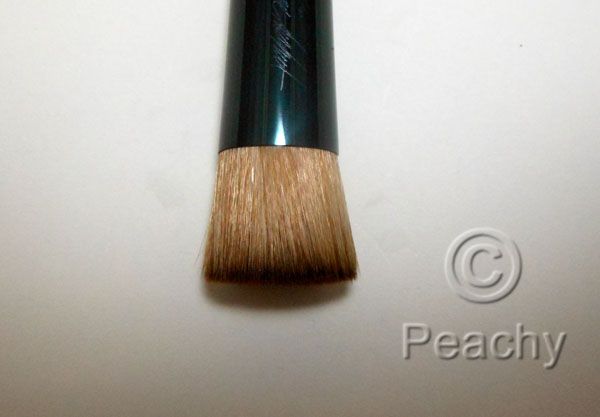
A much denser foundation brush than the last one, this Sonia Kashuk brush has a flat top.  Again, good for buffing in foundation, the flat top (rather than the rounded top of the buffing brush) means that the foundation needs more blending around the edges.  It does, however, work the foundation into the skin more, which is great for creams or dense liquids.  It also doesn't really streak at all, since the dense, flat surface acts as a single entity rather than many individual hairs.
I like this brush even more as a cream blush brush, as it works cream blush into the skin really well.
 
Small Buffing Foundation Brush
 
 
I could not figure out what to call these brushes, the Sephora Airbrush Precision, Real Techniques Expert Face brush and Cover FX Cream foundation brush.  These brushes are terrific for cream foundations, even better for blending cream blushes into the skin, and are the best cream contour brushes I have ever come across.  I've been using the Cover FX one with my Tom Ford Shade and Illuminate and it is a match made in heaven.  As foundation brushes, these combine the best elements of a buffing brush and a flat foundation brush.  They can be used to both buff and stroke on foundation, work well around the edges and features. 
 
As you can see here, these have a pinched ferrule, which is, I believe, the feature that sets them apart from the round buffing brushes.  It's what gives them their versatility and their ability to glide around features and to contour and blend. 
 
Angled Foundation Brush
This Hakuhodo G5555 is technically a duo-fibre brush, as it has synthetic hairs that are longer than goat hairs, in this case, 2 mm longer.  I decided to include it here, because there are several other angled foundation brushes, by Sigma and Shiseido to name two, that I don't have, and I wanted to include the category.  The angle on this brush makes it feel nicer in the hand, and helps to ensure contact with the flat part of the brush against the skin.
I really like this brush, and it would be good for cream blush, but, since this particular Hakuhodo version comes in so many variations, I would suggest one of the smaller or 4mm styles for blush.  In general, I think angled foundation brushes provide the same benefits as the previous brushes in a more user friendly package.
 
Pointed Foundation Brush
Perhaps my favorite of the foundation brushes, the pointed foundation brush, this one the Stila One-Step Complexion brush, is the one I would recommend to those dedicated to using their fingers to apply foundation.  This brush replicates a lot of the good things about them, plus a lot of good things about brushes.  This is probably my favorite foundation brush for applying Make Up For Ever Face and Body (which is one of my favorite foundations of all time), and if I'm wearing it in one of my posts, it's likely been applied with this brush.  Because it's small it fits around the nose and under the eyes, but because it's dense, it blends flawlessly, and because it's pointed, it doesn't suck up too much foundation and waste it as it's mostly surface area.
The pointed foundation brush is also amazing for applying cream blush, cream contour, and powder foundation.  Good for blending concealer around the eyes and nose, which is handy as this particular brush has a concealer brush on the other side.
 
Pros and Cons
Pros:     All of these brushes apply and/or blend foundation onto the skin.  A lot of the choice has to do with the type of foundation you're using and the finish you want to achieve.  I think Buffing Brushes offer the best ease to result ratio, but my favorites are the Small Buffing brushes and the pointed foundation brush because they're smaller, more versatile, and provide more control.  Whatever foundation brush you pick, I really do prefer using a brush over fingers, though I do like using sponges, especially for cream foundations.
Cons:     The denser the brush the harder it is to clean.  Buffing brushes and their ilk soak up foundation, which makes them both wasteful and a pain to clean.  The flat foundation brushes are certainly easier to clean, but they have the reputation for streaks and unevenness.  The smaller brushes might be frustrating to use for applying foundation all over the skin, as they require more strokes and more time.  I would also never use a buffing brush of any size on sensitive or very dry skin as it would likely irritate it and/or make flakes more obvious.
 
The brushes featured in this post are:  Sephora Platinum Foundation Brush 47 (*the whole Platinum line has been discontinued at Sephora and replaced with the Pro line, the number and the shape carried over, but I have no idea on any other similarities or differences), Paula Dorf Foundation Brush (from a travel set), Body and Soul Foundation Brush (dc'd as far as I can tell), Real Techniques Essential Foundation Brush from Travel Essentials, Pointed Foundation Brush from Core Collection, Cargo Magic Brush, Real Techniques Buffing Brush from the Core Collection, Sephora Classic Mineral Powder Brush 45, Sephora Platinum Airbrush 55 (see above note on Platinum brushes), Sonia Kashuk Synthetic Flat-top Multipurpose rush, Sephora Platinum Airbrush Precision Brush 56 (again, see note above), Cover FX Cream Foundation Brush 160, Hakuhodo G5555-2mm Powder & Liquid Brush round/angled, Stila One-Step Complexion Brush 33.  All were purchased and I have received no compensation for featuring them.
 

Thursday, September 6, 2012

A Guide to Brushes: Eye Brushes, Part 7: Miscellaneous Brushes

Miscellaneous Brushes: The brushes that don't have a home.  It's a stretch to call most of these brushes, as some of them are...sponges.  Okay, I said it.  You'll probably want to stop reading now and curl up in the fetal position with some Hakuhodos.  Sponge applicators have the reputation as the most useless piece of crap in makeup.  I'm not going to try and tell you the naysayers are wrong, but they're not exactly right.  Just give these the benefit of the doubt, along with their random brethren, and you may find a use for them after all.
 
Sponge Applicator
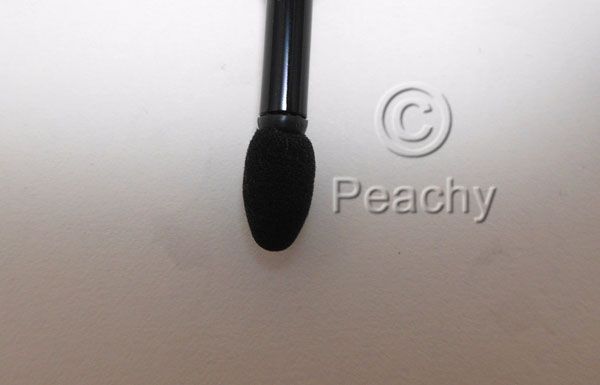
The joke of the makeup world, sponge applicators have a much worse reputation than they deserve.  Sure, they're thrown into every makeup palette from the cheapest to the most luxurious, but don't discount them immediately.  Forget any ideas you might have of blending with them, and consider a sponge applicator your secret weapon when it comes to powdery, glittery, or shadows with bad payoff.  Also good for packing any eyeshadow all over the lid, and they do a serviceable job of smudging pencil liner.  Oh, and you can still throw away the ones that come with eyeshadow compacts, they're still too short to hold comfortable.  (Well, actually, don't throw them away.  That's wasteful.  They're quite handy for arm swatching or if you have tiny doll hands.)  If you're interested in trying out the Cousin Oliver of makeup applicators, find one on a long handle (with replaceable heads if you can find it), like this one from NYX.
 
Silicone Glitter Applicator
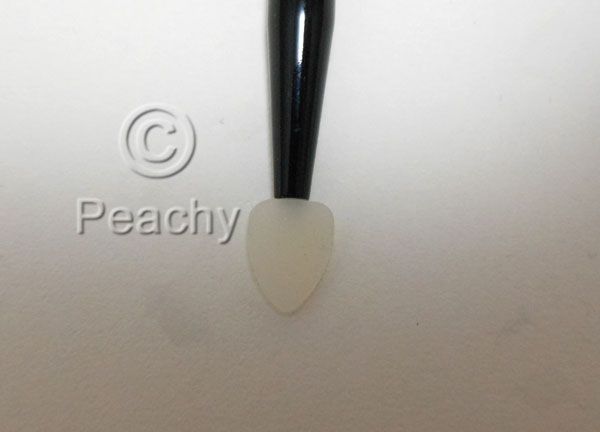
This may look like a sponge applicator, but it's made out of silicone.  It's specifically formulated to use with loose glitters, pigments, and glittery eyeshadows to reduce fallout.  It does actually work, in case you were wondering, and I'd probably use it more often if I liked glitter or loose eyeshadows, but you do have to pack on a lot to get much payoff.  This one was made by Sephora, and I'm pretty sure it's discontinued, but I know some other brands make something similar.
 
Sponge Smudger
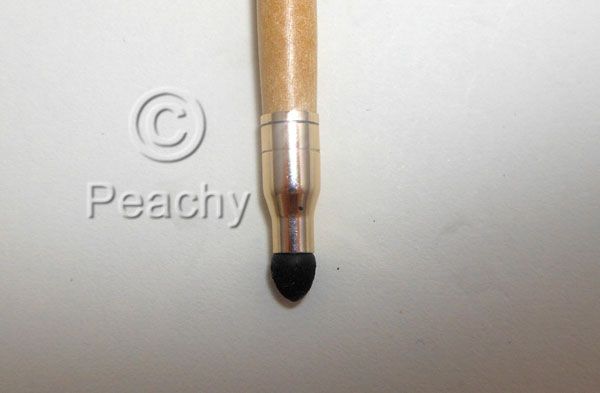
The pointy pencil-brush style cousin of the sponge applicator, the sponge smudge is often found on the end of pencil liners (though this ancient Body Shop one was not).  It's made for smudging liner, and it usually tends to remove more than it smudges, but it's fine in a pinch. 
 
Spoolie Brushes
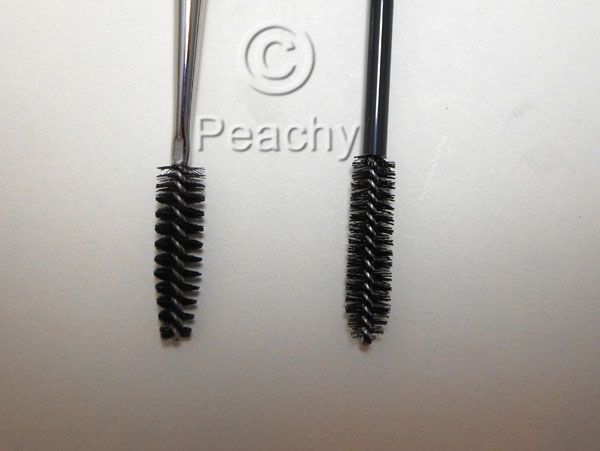
Spoolie brushes look like mascara wands, and if you're so inclined, you could just wash an old mascara wand and use that.  The one on the left is a MAC 204, and the other is a bulk one-use mascara applicator (good for a kit).  These are good for applying mascara, if you're not a fan of the brush, or for hygiene purposes (though that pertains more to the disposable one).  They work well for combing out already applied mascara, especially if metal combs scare you.  They are most useful for personal use, in my opinion, for brushing through eyebrows to neaten them, diffuse previously applied product, or to apply a gel through the brow hairs (like MUFE Aqua Brow).
 
Mascara Fan Brush
Another way to apply mascara, a fan brush is great for a more natural mascara look, or to apply mascara to the top of the lashes (if you're asking "why would anyone do this" you obviously don't have blond eyelashes), it can also build up mascara and provides more separation than a traditional mascara brush.  This one is a art brush by the Princeton Art and Brush company, but I know MAC has one in their Pro line, too.
 
Pros and Cons
Pros:  Some of these brushes seem at first glance like the Cousin Oliver of makeup brushes.  While some of them (hello Sponge Smudger, why I have kept you all these years, I'll never know) are certainly useless, some of these brushes--the mascara fan brush, and, yes, even the sponge applicator--have their place in your makeup drawer.  If you use a lot of glitter, you may want to hunt down a silicone applicator, and everyone needs a spoolie brush, even if it comes with your mascara.
Cons:  Some of this stuff is worthless garbage.  They throw those cheap sponge applicators into eyeshadow compacts and smudgers onto the end of eyeliners for a reason:  they're cheap.  As separate brushes, none of these are essentials. 
 
The brushes featured in this post are:  NYX Sponge applicator, Sephora Professional Glitter Eyeshadow Brush #24 (dc'd), The Body Shop Line Softener, MAC 204 Lash Brush, Disposable mascara applicator from a Beauty Store (I misplaced the bag after this photo was taken, so I don't know the brand), Princeton Art and Brush Company Fan Brush 3050FN Size 20/0.  All were purchased and I received no compensation for featuring them.
Thursday, August 30, 2012

A Guide to Brushes: Eye Brushes, Part 6: Detail Brushes

This post features a variety of eyeshadow brushes for use on small areas of the eye.  It includes pencil brushes and various smudge brushes.

Pencil Brushes
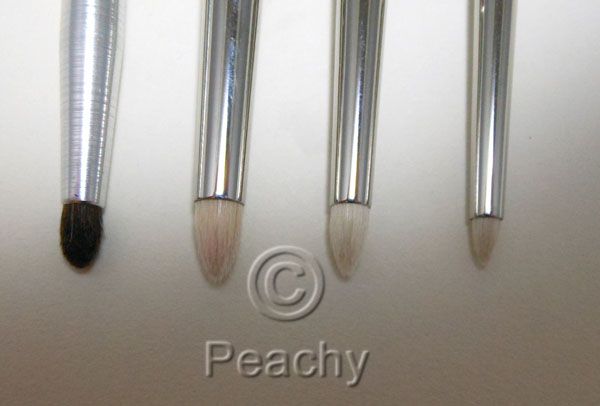
The most common and used of detail brushes, I believe.  The first on the left, which is an Essence of Beauty Fine Crease Brush, notwithstanding, a lot of pencil brushes are goat, like the MAC 219, Hakuhodo G5514BkSl, and Hakuhodo G5515BkSl here.  This picture makes them all look so big, but the Hakuhodo G5515 is about an eighth of an inch long.  These brushes are great for blending out eyeliner, applying shadow to the upper or lower lash lines, precise crease shadow placement, detail in the outer corner (like the dreaded "outer v") and highlighting the inner corner or the brow bone--basically anywhere you want focused or intense placement of eyeshadow.  Goat is a good fibre for this sort of brush, because it provides a good amount of stiffness and softness and holds up to cream eyeliners, but the white hairs get stained so badly (as evidenced by the faint pinkness of my 219.  The Hakuhodos are so pristine because they came straight out of the package before this picture.  The smaller one is now a lovely shade of blue.  The stains do respond usually to oil cleansing, but since oil cleans best when used dry, if you're halfway through cleaning when you realize that pigment is not coming out with cleanser, then you have to wait for it to dry.  At that point, the "Eh, it's clean, and I gotta do ma face" instinct kicks in and next thing you know, you're justifying a pink brush on the internet.  Uh, yeah.  These brushes do their job well, and as detail brushes go they're the most common and most used. 
 
Pointed Smudge Brushes
A variation on the pencil brush, pointed smudge brushes are most commonly found as "Smoky Eyeliner Brushes", like the one on the right from Sephora, which is synthetic.  The one on the left, also by Sephora is a discontinued point smudge brush.  Both these brushes, though they have different shapes, serve the same purpose, which is to apply or smudge eyeliner and apply eyeshadow to a small area.  I think they're more precise than pencil brushes, especially the point smudge, though it's scratchy.  The smoky version of the brush is great if you're looking for a synthetic detail brush, and it is quite good for smoking out liner.  It's less useful for applying powder, unless you want a subtle effect. 
 
Mini Smudge Brushes
These brushes are like tiny flat shader brushes.  Often they're proportionately shorter as compared to width of a shader brush, but neither of these examples really are, which are a Real Techniques synthetic Accent brush, and a Paula Dorf Smudge brush.  These are amazing for applying shadow around the eye, and I love them for smudging the edge of liner.  They provide more control than the previous two styles of detail brush and can be used to smudge or finesse the edges of liner.  Interestingly enough, they often make for excellent gel liner or tightline brushes.  While they do offer more control than a pencil brush, that makes them a little harder to use.
 
Domed Smudge Brush
Similar to a pencil brush, but with a dome instead of a point, this Make Up For Ever smudge brush, is useful for most of the same effects, such as smudging and highlighting, only it will provide a softer less focused or intense effect.  I think this is especially useful for a smoky eye, where you want a smooth gradation of shading. 
 
Pointed Detail Brush
This one (a Hakuhodo 5529, blue squirrel hair) is like a long thin pencil brush.  It's less useful for smudging liner ( especially this one's soft squirrel hair), but more useful for crease work.  It provides a soft, diffused line, but with exacting detail.  Perfect when you want delicacy and precision at the same time.
 
Round Detail Brushes
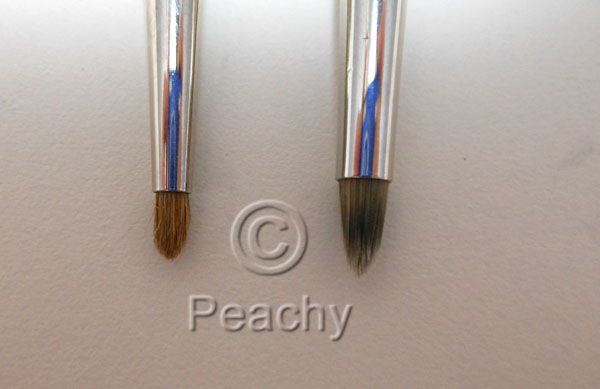
Similar, but sturdier, to the pointed detail brush, and obviously featuring a round end rather than a pointed end, these brushes (Kevyn Aucoin Small Eyeshadow Soft Round Tip, and Royal and Langnickel Smudger) are super precise crease brushes and are great for smudging around the eye and applying eyeshadow under the eye, in the outer corner, or along the top lash line. 
 
 
Pros and Cons
Pros:  These brushes do what none of the other featured brushes can do.  They are like an eyeliner brush crossed with a blending brush.  Tiny, but capable of blending small areas.  If you have small eyes, you may prefer to use one of these brushes for your crease instead of a classic crease brush.  These brushes' versatility means that you will probably want one in your brush collection. 
Cons:  They're tiny.  That's pretty much it.  If you don't want a small brush, or if you like to keep your brushes to a minimum (something which I obviously have no idea about), then you don't need one.  They're tiny brushes; that's the point, but that means they can't do the things a bigger brush does. 
 
The brushes featured in this post are: Essence of Beauty Fine Crease Brush, MAC 219 Hakuhodo G5514BkSl, Hakuhodo G5515BkSl, Sephora Point Smudge 16 (discontinued), Sephora Smokey Eye Brush 24 (from the discontinued platinum line, but the shape and number are still in the current Pro Line), Real Techniques Accent Brush (form the Starter Set), Paula Dorf Smudge brush, Make Up For Ever Smudge Brush 14S, Hakuhodo G5529BkSl, Kevyn Aucoin Small Eyeshadow Brush Soft Round Tip, Royal and Langnickel Smudger Brush.  All brushes were purchased and I received no compensation for featuring them.
Sunday, August 5, 2012

A Guide to Brushes: Eye Brushes Part 5: Liner Brushes

The next part of my massive brush series is liner brushes.

Fine Liner Brushes
The classic fine liner shape is perfect for liquid liners, here is a Kryolan synthetic fine liner brush  (that is super bent--sorry, I keep forgetting to fix that) and a discontinued NARS.  I like to use them even when the liner in question has a felt or sponge tip.  They draw a super fine line and are great for basic liner application as well as wings.  I also like using them for gel and cake liner or dampened eyeshadow.  If you want to do a really thick wing, I think you'll find it frustrating to use a brush this fine, and they're not known being beginner friendly, but still an important and useful brush.
Pointed Liner Brush
A thicker and often stiffer brush than the finer liner brush, the pointed liner brush, this one is by Laura Mercier, tapers from the ferrule, where it is round, to a thin point.  It's a great brush for thick liner and it's size makes it more user friendly than finer brushes.  It won't maneuver around the lashline as well as the finer brushes, though, but if you do "big" liner a lot, you'll probably like it better.
Gel Liner Brushes
The gel liner brush (Sephora's, a definer brush from Laura Mercier, and the Ultra Fine liner from Bobbi Brown) combines the best of both the previous brushes, it's wide at the pinched ferrule then tapers to a point, often making a triangle shape along the way.  These are often sold as or packaged with gel liners, and they really are great for them.  The unique shape offers both flexibility and stability, so they are my number one choice for beginners at gel liners.  These are also perfect for using eyeshadow to line the eye, either wet or dry.  Outside of the eye area, these brushes make for great spot concealing brushes.
Another style of gel liner brush ends in a rounded square shape; these are a soft Stila 4 and a stiffer Make Up For Ever 2s.  They are also good for gel liner, especially the MUFE one, and I love them for powder eyelining.  They are also great for blending pencils after they have been applied to the lash line.
Flat Liner Brushes
The flat liner brush is virtually a necessity if you tightline, which, in case you don't know, is to line by putting liner into the base of your lashes from underneath (it's not to be confused with lining the inner rim or waterline of your upper lashes).  A cake liner and one of these babies and you are good as gold.  They are also good for pushing liner into the lashes from above, especially a cream or gel texture or powder shadow.  Either way they give an "un-made up" look with fuller lashes.  These brushes are a Stila 13 (a little wide for my rounder eyes), a Laura Mercier, Paula Dorf, and an Ulta.
Angled Liner Brushes
Angled liner brushes are another category that multi-tasks (yes, that tiny brush on the far left is angled, it's by Sublime/Brandon, next to that is a Japonesque, MAC 266, Benefit Hard Liner, and Real Techniques Brow Brush).  These are as useful for brows, if not moreso, as they are for eyelining.  As brow brushes, they apply brow powder, powder eyeshadow, or cream and gel brow products to fill in and define the brows.  The Benefit hard angle is my usual brow brush for use with powder eye shadows and the MUFE waterproof brow corrector.  As eye liner brushes, they are commonly suggested for use with gel liner (I know MAC sales associates have often pushed it), and I have seen some great things done with them, but they do not work for me to apply my own gel liner and often apply too thick of a line for my tastes.  I do like them better when used on someone else, and they are terrific for creating a wing at the outer corners (which is why I think they are often suggested).  They are also good for applying eyeshadow as liner or for blending pencil.  I think, as a brow brush they are essential, but as a liner brush, I only suggest them if you struggle with your wings. 

Pros and Cons
Pros:  One of these liner brushes should be in your brush collection.  The fine liner offers the most control and creates a multitude of looks.  The pointed liner brush works for dramatic looks.  Gel liner brushes are (obviously) made for gel liner; they're great for beginners and offer both precision and ease of use.  Flat liner brushes fill in the lashline, making lashes look thicker without a definite line.  Angled liner brushes are superb for eyebrows and great for getting a good flick on eyeliner.  Even if you only use pencil liners, you'll probably want one of these brushes for blending or applying eyeshadow to lock it in.
Cons:  What fine liner brushes offer in flexibility they lack in ease of use.  The classic "liquid liner is so haarrd!!" cliche is probably due to this brush.  (I should probably clarify that I love this sort of brush and have used the two shown here practically to death).  The pointed liner brush can be unwieldy in it's size and stiffness.  Gel liner brushes are great, but I know some of them can splay and not offer a fine enough line.  Flat liner brushes are essentially unitaskers, and they have the problem that they must be held perpendicular to the lash line, and if you're nearsighted (as I am), you'll likely hit the brush handle into the mirror.  Angled liner brushes work for some people, but they don't work for me. 

The burshes featured in this post are: Kryolan Professional Size 0 Round Details Brush (No. 4300), NARS Liquid Liner Brush (dc'd; I don't know how the current version compares), Laura Mercier Pointed Eyeliner (from a double sided brush), Sephora Gel Liner Brush #26, Laura Mercier Wet/Dry Definer Brush, Bobbi Brown Ultra Fine Liner Brush, Stila Precision Eye Liner Brush #4, Make Up For Ever Eyeliner Brush 2S, Stila Flat Liner Brush #13, Laura Mercier Flat Eyeliner (double sided brush), Paula Dorf Eye Definer (from a set), Ulta Flat Eyeliner Brush, Sublime Small Angled Shadow Brush, Japonesque 940 Angled Eyeliner (travel), MAC 266, Benefit Hard Angle Liner Brush (this looks different on their website, no idea if it's comparable), and a Real Techniques Brow Brush (from the starter set).  All brushes were purchased and I received no comepensation for featuring them.